Today, creating a bleach bypass look is easier than ever, as it can be achieved entirely on a computer using DaVinci Resolve’s professional color grading tools. Plus, various tools and plug-ins further simplify this process for beginners and hobbyists.
In this tutorial, you'll learn how to create a bleach bypass look for your videos in DaVinci Resolve using two methods: the Color Page in Resolve and a Boris FX Continuum plug-in.
Let’s dive in!
What is Bleach Bypass?
Let's first review what the bleach bypass process is. In the past, bleach bypass was a technique used in film development where the bleach step was skipped during the process to retain the silver tones. The result was a less saturated image with higher contrast, almost resembling a black and white photo over a color one, but with cooler tones and a dirty appearance.
Today, bleach bypass can be replicated in your color grading process. You can achieve bleach bypass using color tools and plug-ins. DaVinci Resolve, renowned for its comprehensive tools in color grading, is an excellent starting point if you're looking to create a professional bleach bypass look reminiscent of the days of film labs.
Why Use Bleach Bypass in Digital Color Grading?
Bleach bypass is used to create a specific look for your video, typically to make the colors appear colder and more washed out. It has also become a style for certain types of films, such as suspense or war films (like Saving Private Ryan), historical documentaries, music videos, and independent films.
There are numerous combinations you can create with the bleach bypass effect. Desaturating all colors from the video to highlight others, as seen in the film Sin City, makes the video look more "serious" or simply for aesthetic purposes. Please note that the bleach bypass look may not be suitable for every video.
How to Create the Bleach Bypass Look in DaVinci Resolve

Start by opening your project or importing the footage. Then, ensure to switch to the color page to begin the color grading process and create the bleach bypass look for your video.
-
Step 1: Set Up the Node Tree
The Color page has a node-based workflow, so ensure the Node grid is enabled by clicking the Nodes button. Now, you're ready to set up the node tree for bleach bypass. Start by adding a new layer node. You should have the layer mixer at the end of the node tree and the two layers combined by the node layer in the beginning.
-
Step 2: Color Correction
Select node number one and start a color correction. Work on white balance, increase contrast, and make all necessary adjustments to ensure accurate colors. You can always return to this node to make further adjustments to contrast and saturation after the bleach bypass.
-
Step 3: RGB Mixer
Select node number two to make the black and white image, and go to the RGB Mixer in the toolbar. Below the RGB bars, check the Monochrome option. Now, you can manually adjust the Red, Green, and Blue channels of your monochromatic image.
-
Step 4: Change the Composite Modes
Remember when I mentioned that the original bleach bypass technique was like overlapping color and a black-and-white image? That's exactly what we're going to do now.
Select the Layer Mixer in the node tree and right-click it to display the drop-down menu. Select Composite Mode and choose the Overlay mode to complete the bleach bypass look.
-
Step 5: Refine the Effect
You can still fine-tune the result. Make some adjustments to the first node using the custom curves tools or the color wheels to desaturate specific colors. You can also add serial nodes after the Layer Mixer to apply a film grain effect, creating a dirty look for your videos.
How to Create the Bleach Bypass Look in DaVinci Resolve with Boris FX Continuum BCC+ Bleach Bypass
In the second part of this tutorial, you’ll use the Continuum plug-in from Boris FX. Specifically, the BCC+ Bleach Bypass filter enables you to create a bleach bypass effect with just a few clicks.
-
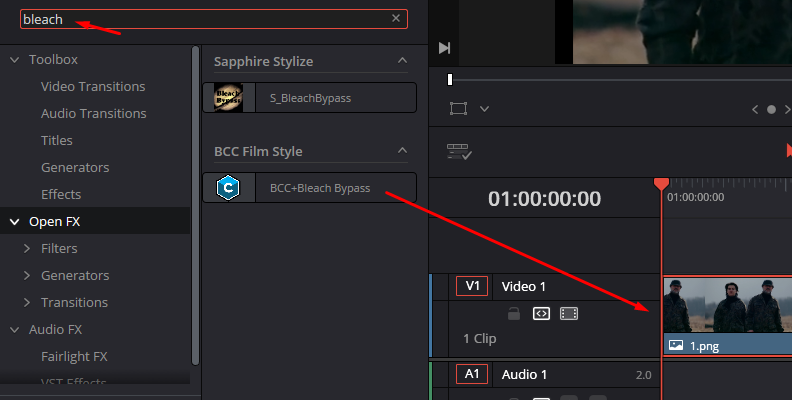
Step 1: Apply BCC+ Bleach Bypass
The first step is to import your footage and create a new timeline. Select the video clip and search for the effect BCC+ Bleach Bypass in DaVinci Resolve’s Effects library. Drag the effect to the clip on the timeline to apply it.
-
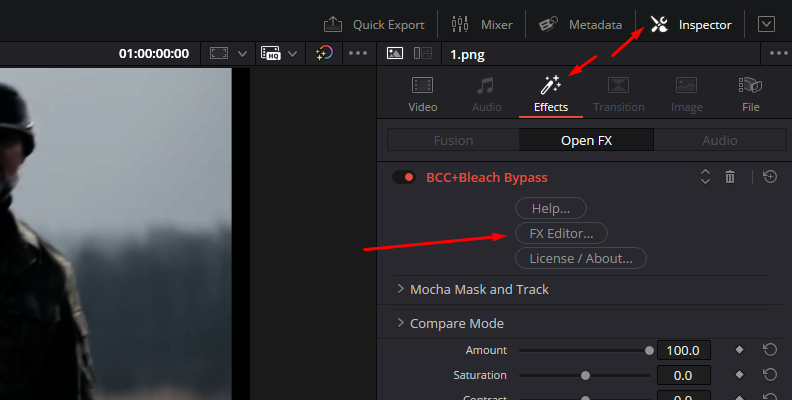
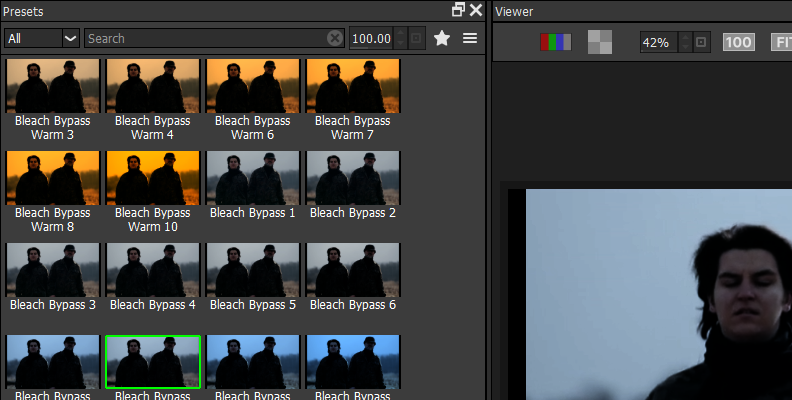
Step 2: Looks and Presets
Open the Inspector panel, and under the Effects tab, click FX Editor. BCC+ Bleach Bypass comes with factory presets you can click and preview. This is the quickest way to add a bleach bypass look to your videos, and all the presets are customizable from the Inspector panel settings. Click Apply if you want to use a preset.
-
Step 3: Edit the Bleach Bypass Effect
The effect has only four settings to create the look: Amount, Saturation, Contrast, and Temperature. Use the Amount to control the intensity of the filter, desaturate or oversaturate the image with Saturation, adjust the Contrast, and set the image's temperature. Lower values in Temperature will make the image yellow or orange, while higher values will make it blue.

There are no magic tricks to create the best look. You can start with a preset and then adjust the contrast or saturation to your liking, experimenting with different combinations.
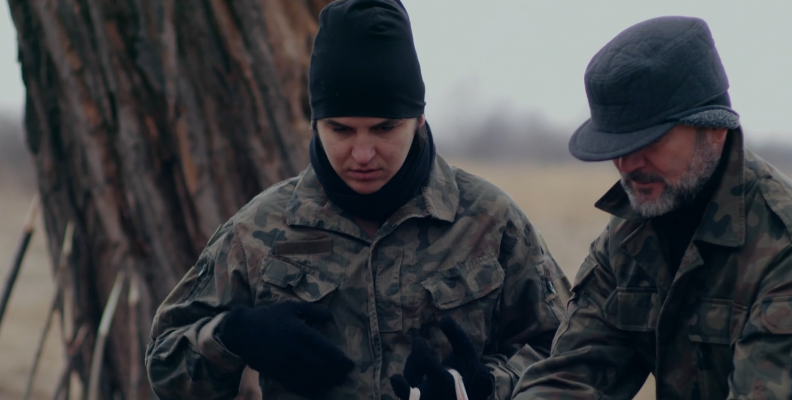
Before BCC+ Bleach Bypass:
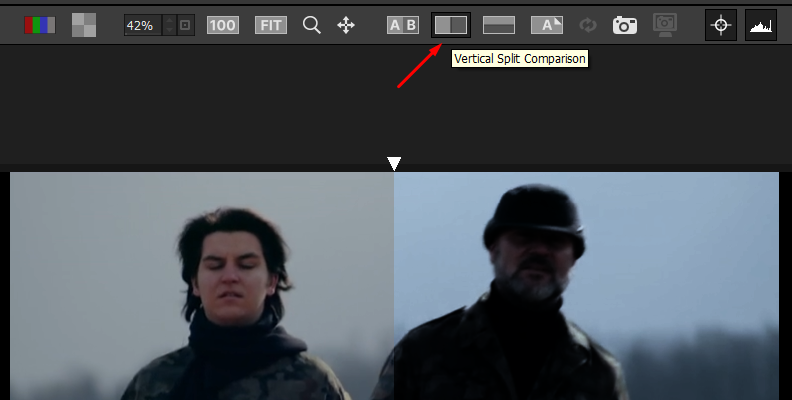
After BCC+ Bleach Bypass:

Can We Add Before and After?
You can set a before-and-after comparison with the Compare feature in Continuum. Click "Compare Mode" and select "Side by Side" to view the before and after images side by side, or choose "Compare" and adjust the wipe slider to view different areas of the image.
Final Words
The Bleach Bypass style is a look you want to learn how to make. It can be versatile and make it as slight or prominent as you need it for your projects. With the Continuum plug-in, the process is easier for even beginner video editors, and the rest of the Continuum filters can enhance your videos to make them stand out among the rest.
Good luck!