Creating cinematic visual effects is an essential skill in video editing, one that can really make your content stand out and shine when applied correctly. Speaking of visual effects (VFX), one of the most versatile effects you can use is a form of smoke.
Whether you want to add atmosphere to a scene, enhance dramatic moments, or create a transition effect, adding a smoke effect in Adobe Premiere Pro is a simple yet effective way to achieve that.
This guide will help you learn why smoke effects are useful, what the most popular use cases are, as well as how to create them step by step in Premiere Pro. So, without further ado, here's what you need to know.
Why Create a Smoke Effect in Premiere? - Use Cases
Adding a smoke effect in Premiere Pro serves multiple purposes in video production. Here are some common scenarios where this effect can be a valuable addition to your shot or scene.
- Dramatic Atmosphere: Smoke can add an eerie or intense mood to a scene, making it ideal for horror, thriller, or action videos.
- Cinematic Transitions: A smoke effect can help create smooth, visually appealing transitions between scenes.
- Explosions & Fire Effects: If your scene includes explosions or fire, adding smoke enhances realism and immersion.
- Mystical or Dreamlike Sequences: Soft, slow-moving smoke can give a dreamy or surreal effect to fantasy-themed videos.
- Title & Text Effects: Smoke can serve as a background element or even animate text for a more dynamic appearance.
- Music Videos & Commercials: Many music videos and advertisements use smoke to create a moody or edgy aesthetic.
Add Smoke Effect in Premiere Pro

There are two main ways to add a smoke effect in Premiere Pro: using stock footage and creating a custom effect with built-in tools. In this section, we’ll cover both approaches.
-
Method 1: Using Stock Smoke Footage
The easiest way to add smoke to your video is by using high-quality stock footage. This approach is exactly how you use smoke overlays in your video editing program without having to create the effect yourself from scratch. Follow these steps:
-
Step 1: Import Smoke Footage
Download a smoke video with a black background from stock footage websites like Pexels, Pixabay, or premium sources like Envato Elements.
Open Premiere Pro and import the smoke footage into your project by dragging it into the Project Panel.
-
Step 2: Place Smoke Footage on Timeline
Drag your smoke footage onto a new layer above your main video clip in the timeline.
Adjust the length of the clip to match the duration of your scene.
-
Step 3: Change Blend Mode
Select the smoke clip and navigate to the Effect Controls panel.
Click on Opacity and change the Blend Mode to Screen or Add to remove the black background while keeping the smoke visible.
If needed, use the Luma Key effect to further clean up the background.
-
Step 4: Adjust Opacity and Position
Lower the opacity if the smoke appears too strong.
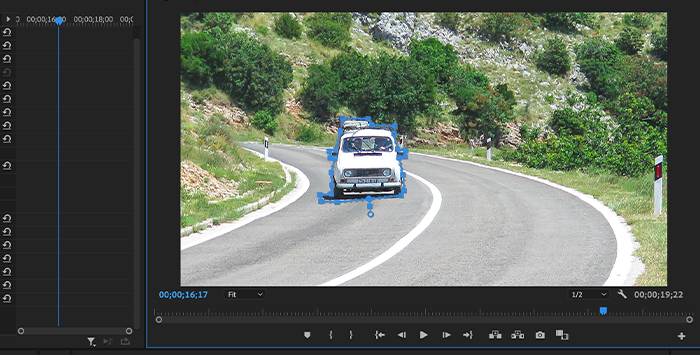
Use the Position and Scale settings in Effect Controls to move and resize the smoke as needed.
-
Step 5: Add Effects for Realism
Apply the Gaussian Blur effect to soften the smoke for a more natural look.
Use Color Correction (Lumetri Color) to match the smoke’s tone to your scene.
Consider adding a Directional Blur to simulate wind movement if needed.
-
-
Method 2: Creating a Custom Smoke Effect in Premiere Pro
If you don’t want to use stock footage, you can create a smoke-like effect using built-in tools.
-
Step 1: Create a New Transparent Video Layer
Go to File > New > Transparent Video and click OK.
Drag the transparent video onto a new layer above your main clip in the timeline.
-
Step 2: Apply the Turbulent Displace Effect
Open the Effects panel and search for “Turbulent Displace.”
Drag this effect onto your transparent video.
In the Effect Controls panel, adjust the following settings:
Increase the Amount to create more distortion.
Adjust the Size to make the smoke appear softer or more detailed.
Increase Complexity for a more natural, wispy effect.
-
Step 3: Animate the Smoke
Set keyframes for the Evolution parameter in Effect Controls to make the smoke appear as if it's moving.
Adjust the Position keyframes to make the smoke drift naturally.
-
Step 4: Add Opacity and Blur Effects
Reduce Opacity for a more transparent, realistic effect.
Apply the Gaussian Blur effect to soften the smoke.
-
Step 5: Color Grade for Realism
Use Lumetri Color to match the smoke’s color to your scene.
Increase the contrast or saturation for more dramatic smoke.
-
Add Smoke Effect in Premiere Pro with Continuum or Particle Illusion
Our previous section covered two different methods for adding a smoke effect to your video in Adobe Premiere Pro. However, compared to the method you'll see in this section, they're both a lot more complicated and take more skill and time.
It's not a secret that using a plug-in built specifically for a task is the quickest and superior way, but the catch is usually the cost. This isn't the case with Continuum, however, since you can download a free trial version that lets you use all the tools in the pack within your compatible video editor of choice.

Should you decide to try Continuum, know that it's compatible with all popular video editors, like Premiere Pro, After Effects, Final Cut Pro, DaVinci Resolve, Vegas Pro, and more.
To get started, all you need to do is open the BorisFX website, navigate to the Continuum product page, and click the download link.
When you install Continuum for your software of choice, follow these steps to add a smoke effect to your video clip(s).
-
Step 1: Create a New Project and Import Media
The first step is to open your software of choice that you've installed Continuum for, in this case Premiere Pro, and create a new project.
After creating the project, you need to import the video clip(s) to which you want to add the smoke effect.
-
Step 2: Drag the Clip(s) to the Timeline to Create a Sequence
Once you import the clips, you should see them in the "Project" panel. From here, all you need to do is drag them to the timeline area to create an editable sequence.
When the sequence is ready, you can make all sorts of adjustments, such as trimming, increasing time/duration, applying effects, and more.
-
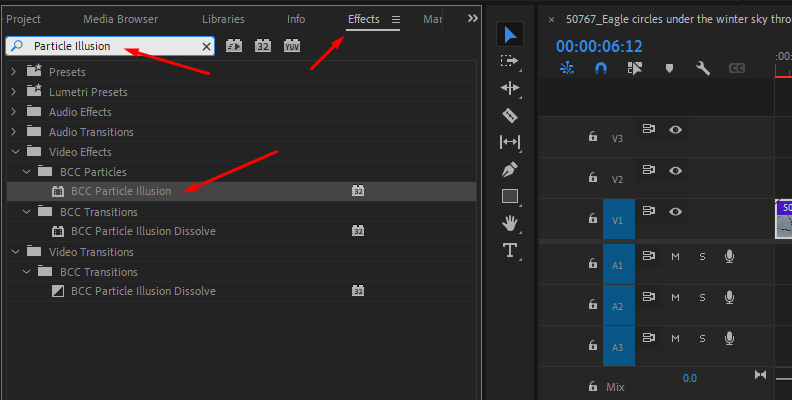
Step 3: Open the Effects Panel and Apply the Effect
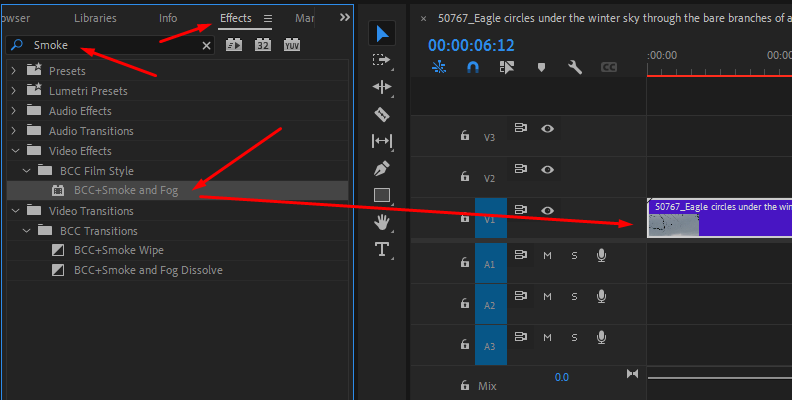
Open the "Effects" panel and use the search bar to locate the effect you want to use. In this case, you can use BCC+ Smoke & Fog, or you can launch Particle Illusion by using the BCC Particle Illusion effect.
You apply an effect by dragging and dropping it over the video, as shown in the screenshot below.
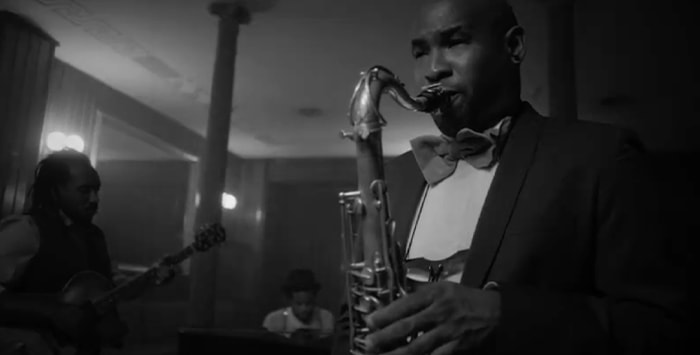
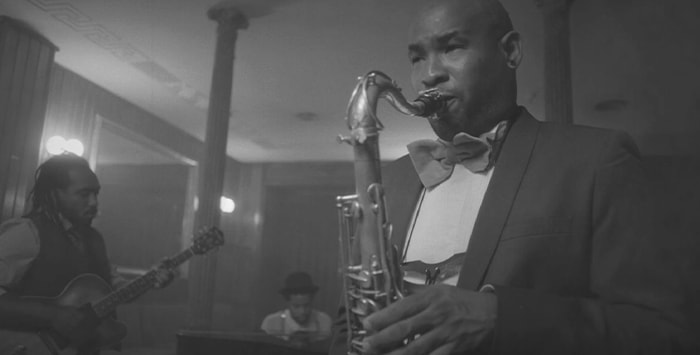
If you apply the BCC+ Smoke & Fog effect to your video, you'll immediately notice the added smoke to your video.
Before BCC+ Smoke & Fog:
After BCC+ Smoke & Fog:
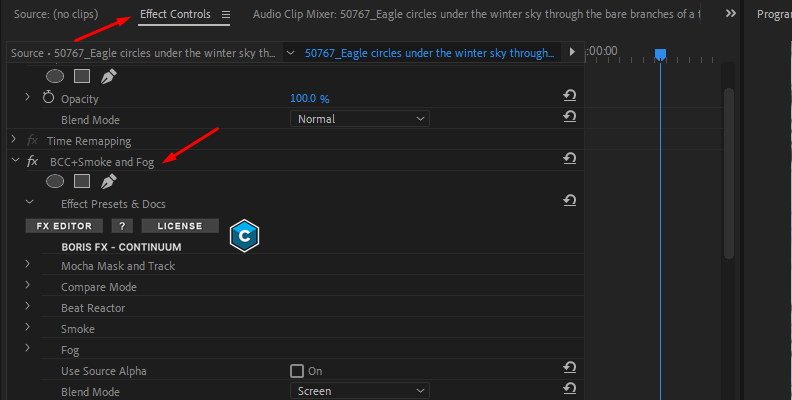
If you decide to apply the Particle Illusion effect instead, you'll need to head over to the Effect Controls panel and click "Launch Particle Illusion" where you can then find hundreds of various particles to add to your video, including various effects of smoke.

-
Step 4: Make Adjustments if Needed
The Effects Control panel, which you can launch from the top-left corner of your screen in Premiere Pro, contains all the parameters of all effects you have added to your video. Here, you can adjust anything to your liking to your project's needs if it's not perfect right off the bat.
All Continuum effects have lots of adjustable parameters, and the same applies to any particles and effects you add through Particle Illusion too.
And that's all there's to it! It's that easy when using Continuum tools.
Final Words
That concludes our guide for adding a smoke VFX to a video clip within Adobe Premiere Pro.
Hopefully, this will help you with all your future work, as adding such effects can sometimes be a game-changer for scenes where it is mandatory, but you didn't make it happen during production.
We wish you the best of luck with your future projects, and thank you for reading!