If you're looking for a way to blur the edges of an image to blend it seamlessly with the background, whether it's solid, transparent, or a different background image, this tutorial is for you!
Learning how to blur edges in Photoshop can also help you achieve artistic effects for dreamy sequences, fix harsh edges, or bring attention to a subject.
In today’s tutorial, you’ll learn various methods to blur edges in Photoshop. So, pick a photo you want to blur the edges of, and let’s begin!
How to Blur Edges in Photoshop

Make sure you have the latest version of Adobe Photoshop to follow the tutorial, as some features may not be available in older versions.
Method 1: Feather Selection
This method is ideal when you want to change the background to a different color or place the selection into another background image or collage.
-
Step 1: Select Subject
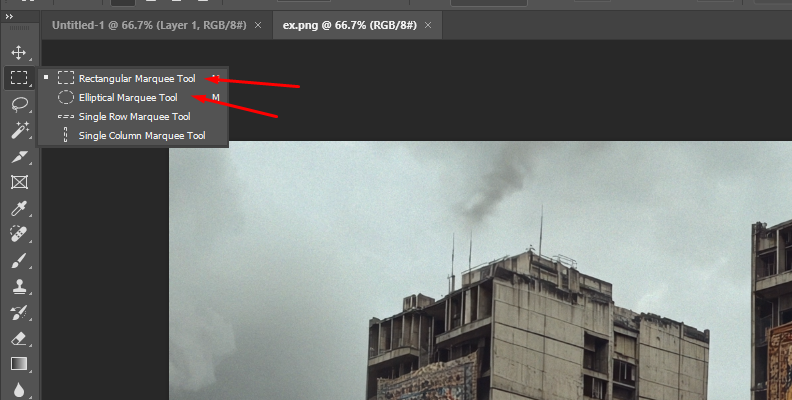
Import the image into Adobe Photoshop and use a selection tool to select the area you want to keep untouched by the blur effect.
Depending on your image, the subject you're isolating, and the final effect you're looking for, you can use the Elliptical Marquee tool or the Rectangular Marquee tool.
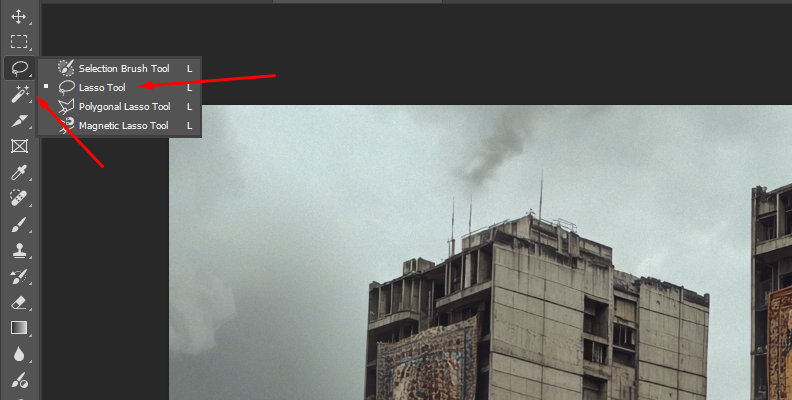
For more complex subjects and shapes, use the Lasso tool or the Magic Wand to make the selection.
-
Step 2: Blur Edges
After making the selection, go to the top menu Bar and click Select > Modify > Feather.
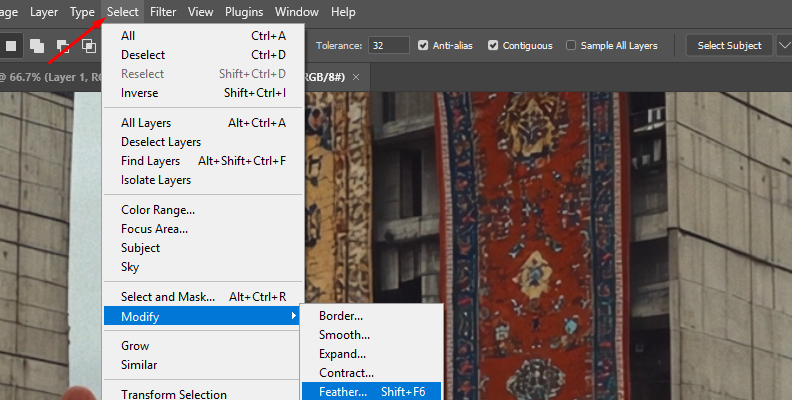
The Feather Selection dialog box pops up, where you can adjust the Feather Radius using the slider.
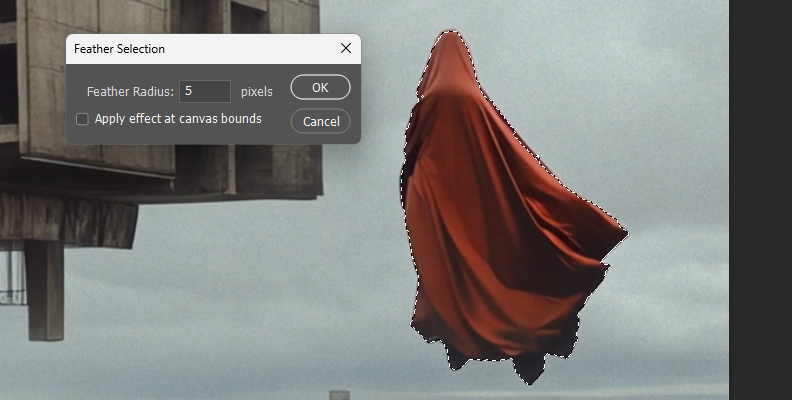
The Feather Radius controls the feathering in the edges of the selection. Lower values create a harder edge and smaller edge transitions, and higher values make the edge transition broader and smoother.
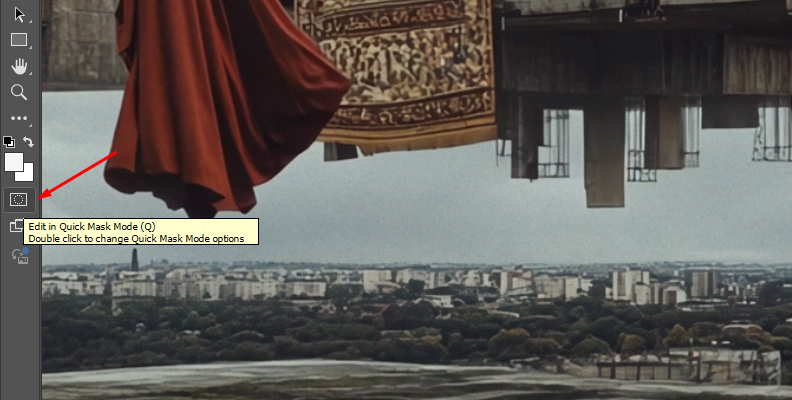
For more control over the final result and to see the Feather effect in action in your image, enable the Quick Mask mode from the left-side toolbar.
Click the icon that looks like a rectangle with a circle inside. A red overlay appears over the entire image where the Feather effect is active.
-
Step 3: Cut the Selection
With the selection still active, click the New Layer Mask button at the bottom of the layers panel to create a mask from the selection.
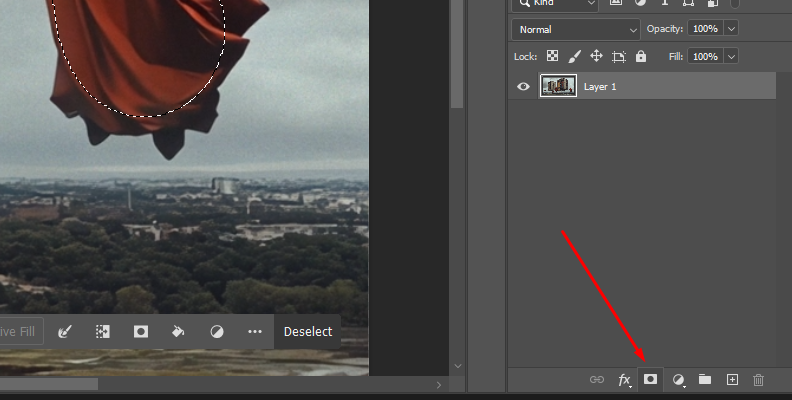
This will cut the selection from the background to let you place a different background or a solid layer behind the layer.
-
Step 4: Change Background
Now it's time to change the background layer. Create a new adjustment layer and select the Solid Color option.
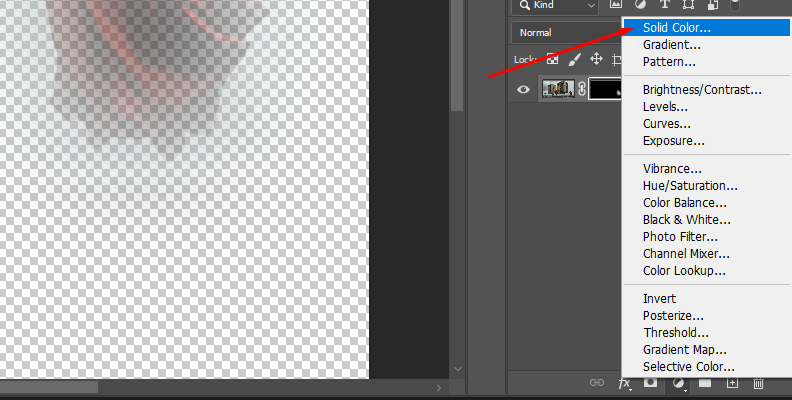
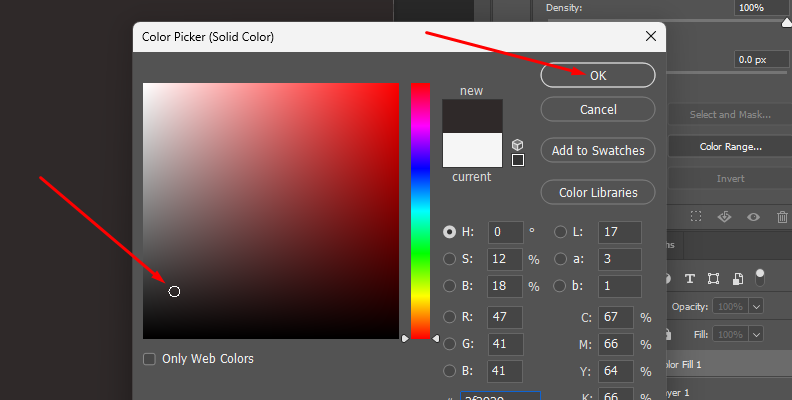
Choose the color of your preference from the color picker and click OK.
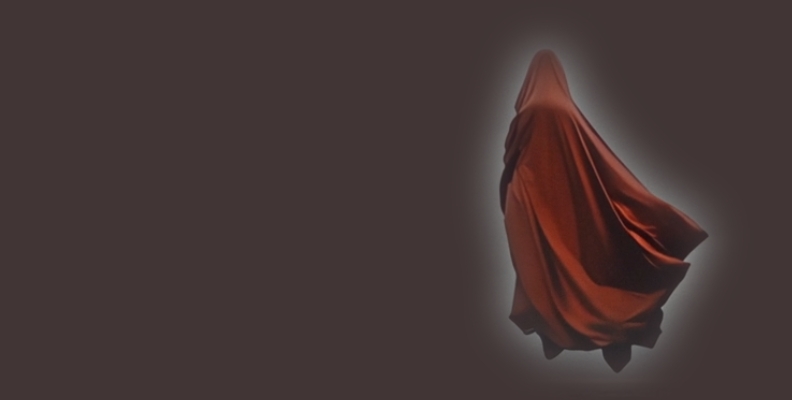
Here's the cutout placed on a new solid color background:
You can also import a new image and place it at the bottom in the layers panel to make it the new background layer.
Method 2: Manual Blur
This method is a manual approach to creating a subtle transition between a subject and the background when you don't want to change the background. It also works as an additional step to the other methods for fine-tuning details in the edges.
-
Step 1: Import Photo into Photoshop
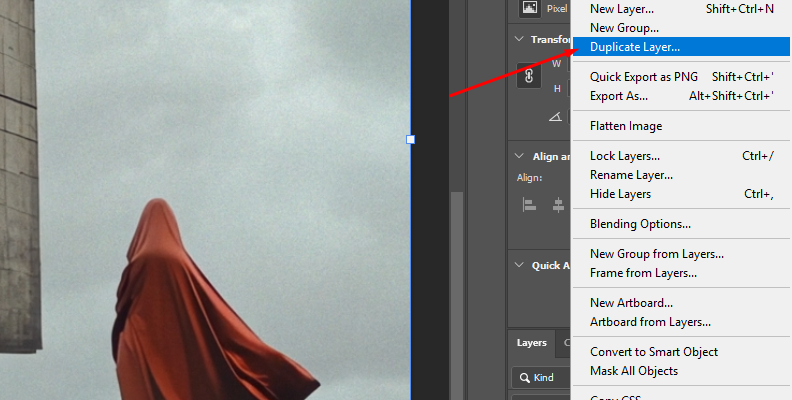
Open your image in Photoshop and duplicate the layer to avoid modifying the original image file.
-
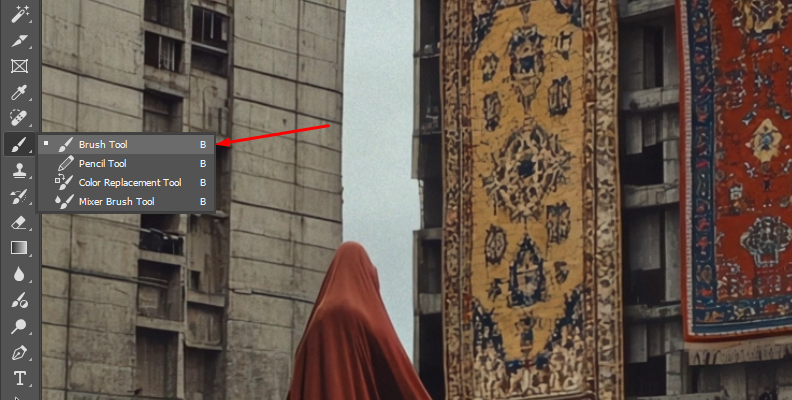
Step 2: Blur Tool
Select the Blur brush from the toolbar and adjust the brush size, hardness, and strength from the Options bar.
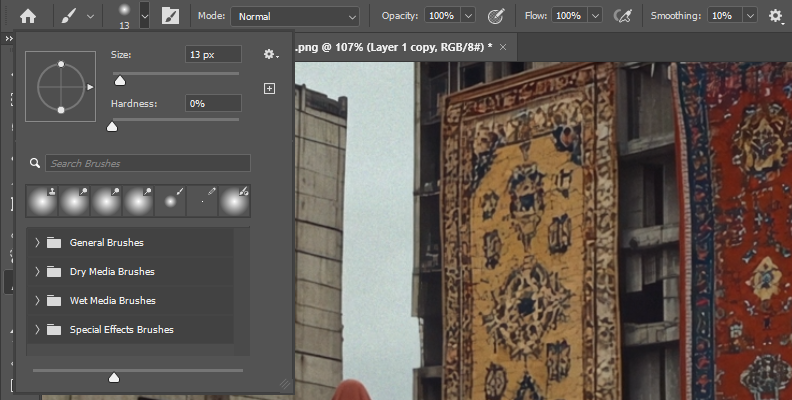
Paint over the edges and areas you want to blur manually. You can zoom in and out of the image and change the brush size and strength to achieve the desired smoothness.
Method 3: Gaussian Blur Effects
With this method, you can blur the entire background of the photo to bring attention to a subject or area in the image.
-
Step 1: Import Photo
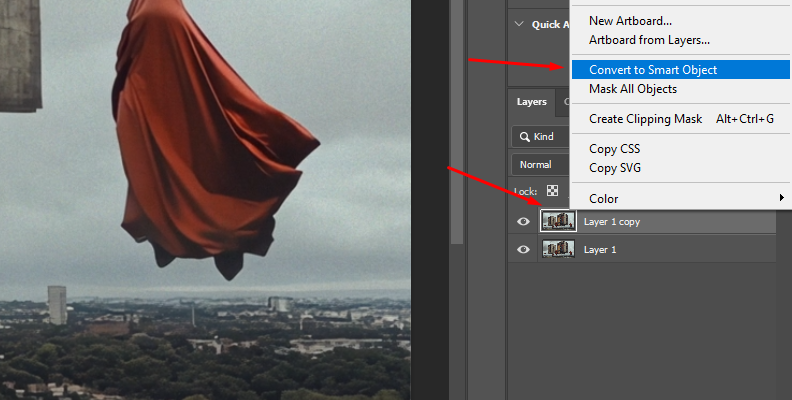
Import the photo and duplicate the image layer. Right-click the duplicate layer and select the "Convert to Smart Object" option. This will allow you to adjust the Gaussian Blur at a later step.
-
Step 2: Apply Gaussian Blur Effect
Go to the top menu bar and click Filter > Blur > Gaussian Blur and wait for the Gaussian Blur dialog box to appear.
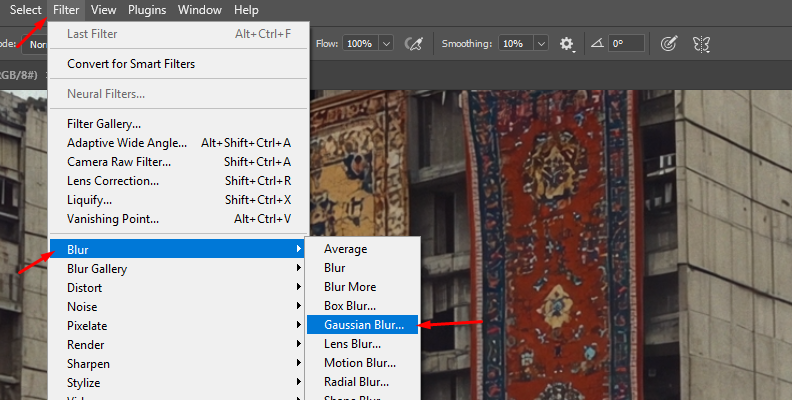
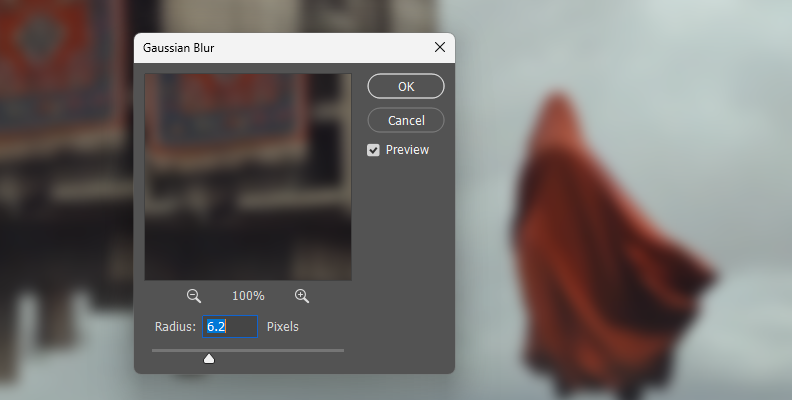
Adjust the amount of blur using the slider and press OK to apply the effect.
The Gaussian blur effect is applied to the entire image. Since you add the effect in a Smart Object, you can later re-adjust the Radius.
-
Step 3: Mask the Effect
Now, let’s define the area of the image that you want to stand out with a gradient mask. Press the Add Layer Mask button in the Layers panel and select the Gradient Tool (or press G).
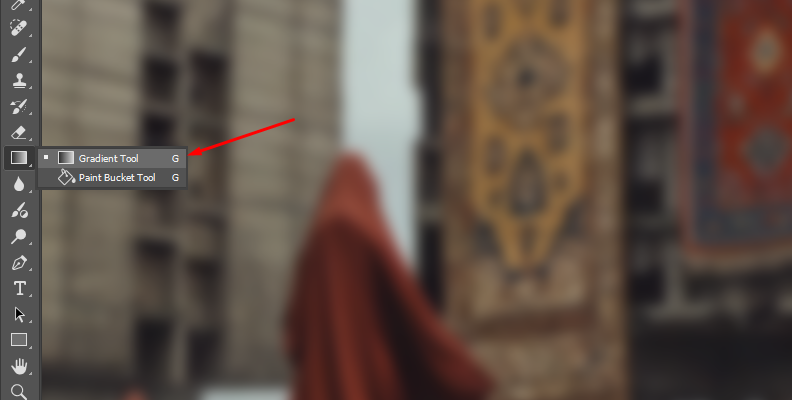
Then, select the Radial Gradient from the options bar and click and drag over the area you want to stand out, creating a mask around the subject.
-
Step 4: Fine-Tune the Blur Effect
To blur more or less of the background, click the Gaussian Blur filter listed below the smart object layer to display the Gaussian Blur dialog box and adjust the Radius.
Blur Edges in Photoshop with Optics' Bokeh Style Tools
The tool you’ll use in the following part of the tutorial is Boris FX Optics. With Optics, you have various ways of creating blur and bokeh effects using filters.
The bokeh tools in Optics help you create a defocused camera lens without blurring away bright spots in the background.
Try Voice Enhance Now!
Instantly transform any voice recording into professional-quality sound with the power of AI. No internet access required- your audio stays private and secure. Toggle it on/off to hear the difference.
On-location Interview
Selfie-style Phone Audio
Zoom Call
Ridiculous Echo
Traffic Noise
Far from Mic
Untreated Room
Recording at Home
On-location Interview
We’ll be using the Photoshop plug-in for this tutorial, but you can follow using the standalone version. You can follow this tutorial using the Optics free trial if you don’t have a license yet.
-
Step 1: Import Photo
Open a new Photoshop document and import the image you want to blur. Duplicate the layer to preserve the original image file. Then, convert the layer to a Smart Object to make non-destructive changes to the image.
-
Step 2: Apply Boris FX Optics
Optics works as a plug-in inside Photoshop. To add Optics to the Smart Object layer, go to the Filter menu bar and find the Boris FX > Optics path.
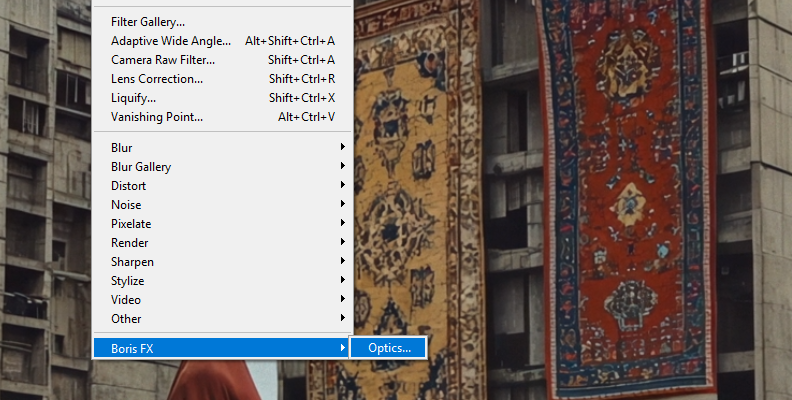
Wait for the Optics user interface to launch and import the Image automatically.
-
Step 3: Create a Mask
Now, you're in the Optics user interface with the image in the work area. The next step is to mask the object you want to draw attention to.
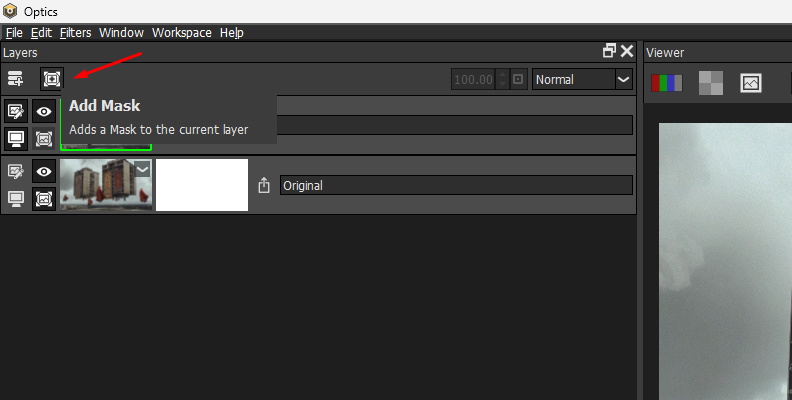
Above the layer panel on the left side of the screen, click the Add Mask button. Optics offers several masking options, but for today, let's use the EZ Mask tool.
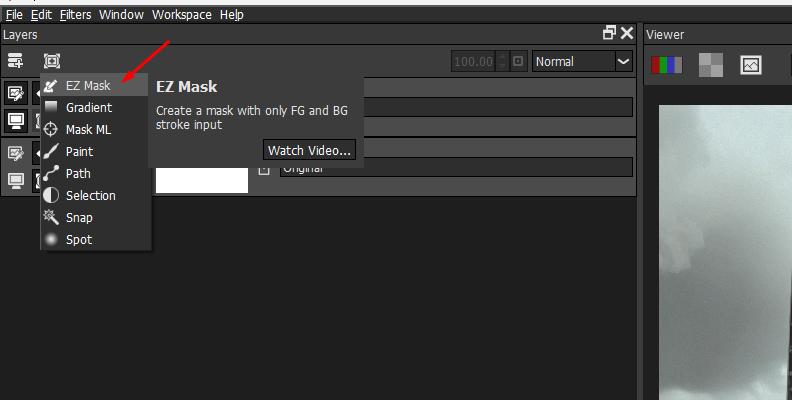
The EZ Mask can isolate almost any object in your image, including fine details such as hair, fur, smoke, and reflections, with minimal effort by estimating the transparency values from a sample.
Click to paint an inner outline around the object you want to isolate.
Then, right-click to paint on the background area. A few brush strokes in the background are enough. You don’t need to paint the background or foreground subject.
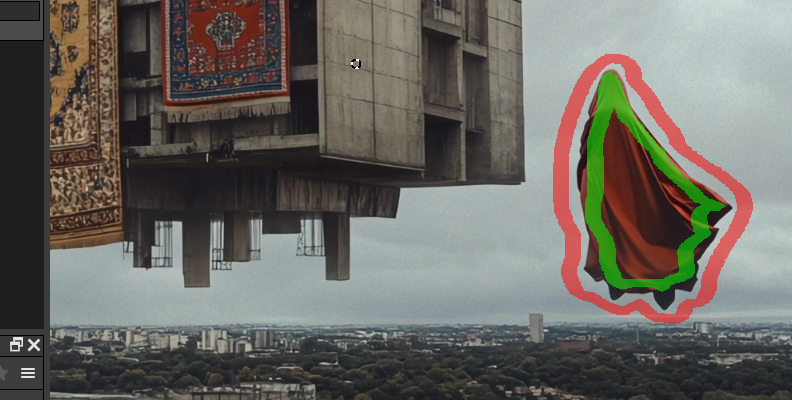 Important note: In a case where you want to blur the background and isolate the subject, you may need to do this the other way around, meaning painting the subject you want to isolate with the red brush (right click) and the background with the green brush (left click).
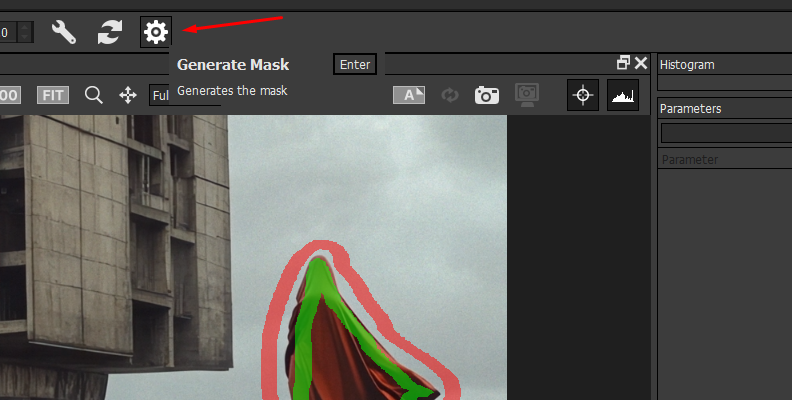
Once you have the sample, click the Generate Mask button (the Gear icon in the option bar) or press Enter.
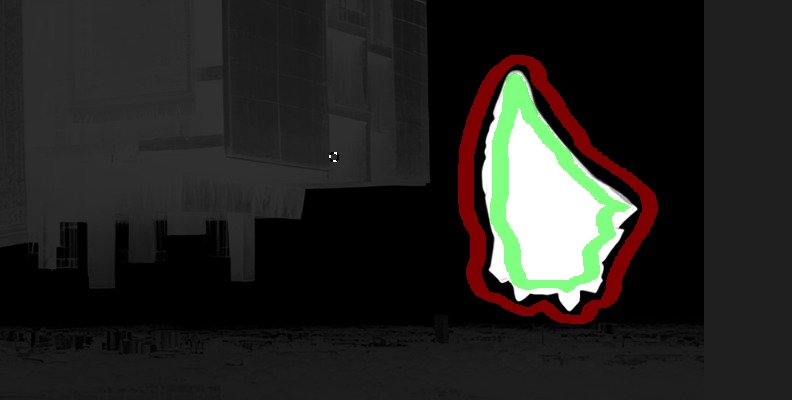
Wait for Optics to process the samples and generate the mask. Press M to see the mask in the viewer and verify that you have a good matte.
-
Step 4: Add the Bokeh Filter
To blur the edges of the subject, let’s create a Bokeh effect. With Optics’ Bokeh styles, you can blur the background to bring attention to your subject while creating a beautiful bokeh effect in the background.
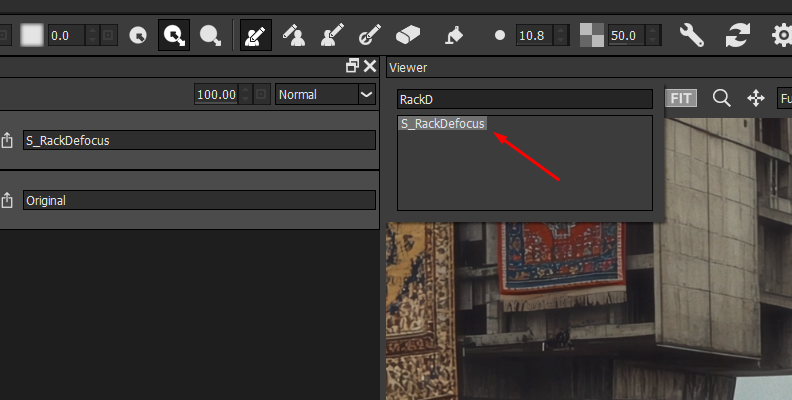
You have several ways to blur in Optics. Some filters you can experiment with are: Blur, Depth of Field, and Edge Aware Blur. But, for this tutorial, you'll create bokeh with the S_RackDeFocus filter.
Search for the S_RackDeFocus filter in the filters library, below the viewer in the Diffusion/Blurs category. Click the filter to apply it to the layer.
Below the layers panel, you can explore the preset gallery to see if there's something you like.
-
Step 5: Create the Bokeh Effect
Now, if you go to the right side of the screen, you'll find the parameters.
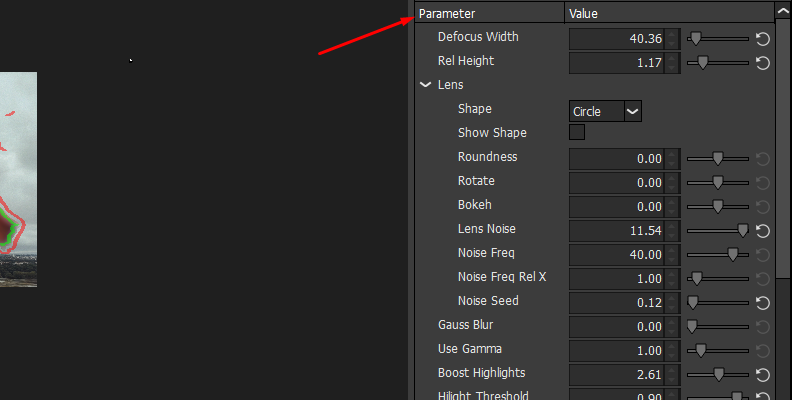
The first setting you can modify is the Defocus Width, which controls the blur.
However, unlike Gaussian Blur and other blur filters, what's interesting about the S_RackDeFocus filter is that the blur it creates is not just blur; it creates shapes. So, you may want to leave this setting for the last step.
A little down the parameters panel, you can see the Lens settings. Under this group, you can change the Shape of the lens, its roundness, rotate the iris shape, add noise, and adjust the bokeh style.
To increase the brightness of the bokeh lights, adjust the “Boost Highlights” and “Highlight Threshold” settings. It will increase the highlights without affecting the dark and midtones in your image. If your image has dim lights in the background, adjust these two settings to brighten them.
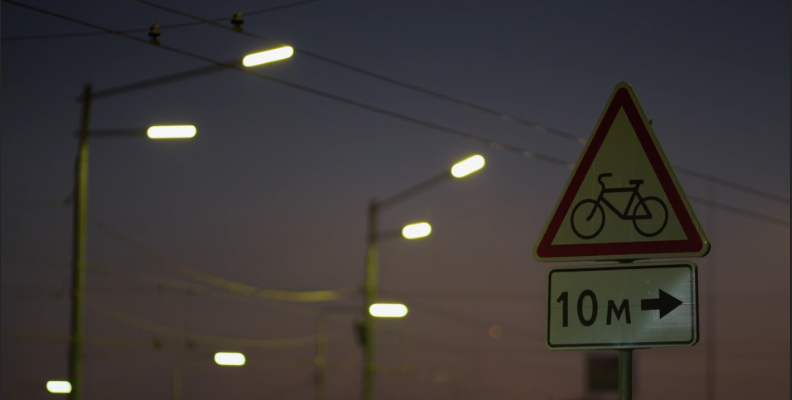
You can add chromatic aberration to give an analog feel to the image by increasing the "Chroma Distort" and "Color Fringing" parameters. The Chroma Distort adds color fringes to the edge of the image, and Color Fringing to objects within the image.
If you have colored lights in your background, you can create very eye-catching bokeh looks by experimenting with these two settings.
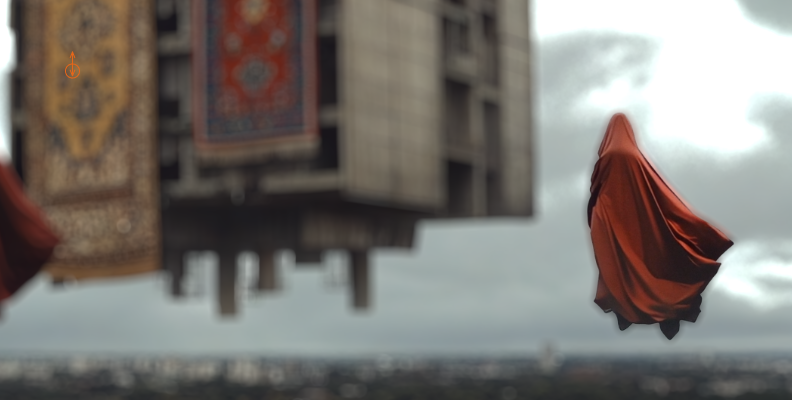
Now, adjust the Defocus Width until you blur the background with a bokeh effect.
-
Step 6: Save Image
When you have finished with the bokeh filter, click Apply at the bottom right corner. Optics will close, and you’ll return to Photoshop.
Remember that the layer is a Smart Object, so you can simply click the Optics filters in the layer to open Optics again and make changes. Now, you can save the final image and export it.

Final Words
Now you have multiple options to blur edges in Photoshop!
You can cut the image and blur the edges to place it on a different background, blur backgrounds to draw attention to an object, and create beautiful, eye-catching bokeh effects using Optics.
Optics is available as a standalone photo editing app and as a plug-in for Adobe Photoshop and Lightroom.
Get Optics today to enhance your photos with hundreds of effects, particles, and AI masking tools.
Good luck!