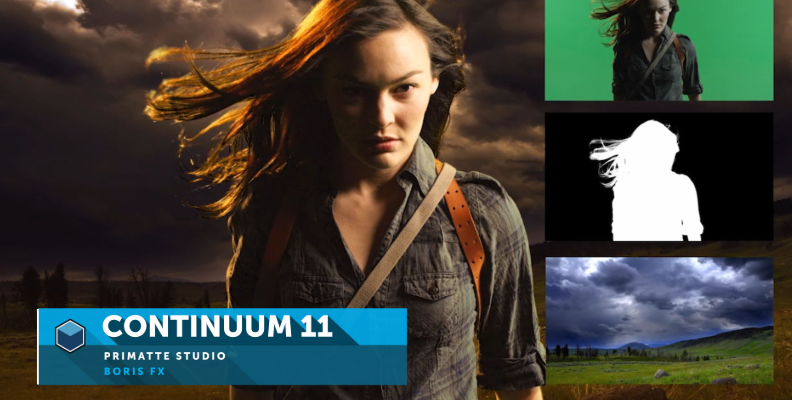
The green screen effect, known as chroma keying, is a post-production technique where you use a green screen in the background and then remove the green color to insert a new background clip and visual effects. Sometimes, a blue screen is used when a green prop is present in the scene that you don't want to accidentally remove.
Filming with a green screen lets you shoot anywhere without being physically in that location. Replacing a green screen requires software to analyze the color (green, blue, or another) and remove it from the scene.
In this guide, you’ll learn how to change a green screen background using Continuum Primatte Studio from Boris FX. Primatte Studio is a chroma-keying powerhouse with in-house technology that automatically analyzes the background in a video to replace it with a different background video clip.
Let’s dive in!
How to Change a Green Screen Background with Continuum Primatte Studio
To use Continuum Primatte Studio, you’ll require compatible video editing software such as Adobe Premiere Pro, After Effects, Avid Media Composer, Blackmagic Davinci Resolve, Nuke, and VEGAS Pro.
Step 1: Import Green Screen Footage
Import your green screen video to your host and apply BCC Primatte Studio. Search in your host's effects library for the BCC Key & Blend category and find BCC Primatte Studio. Click and drag the filter to the green screen video in the timeline to apply it.
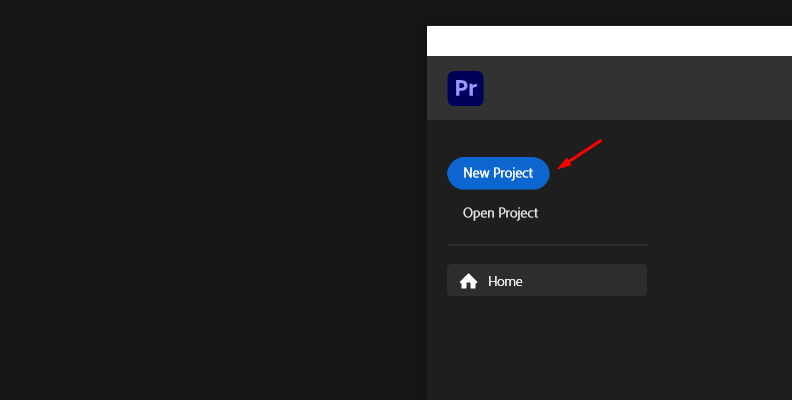
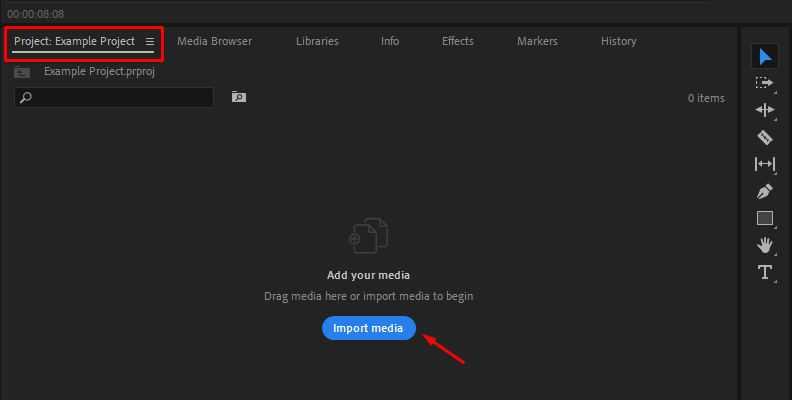
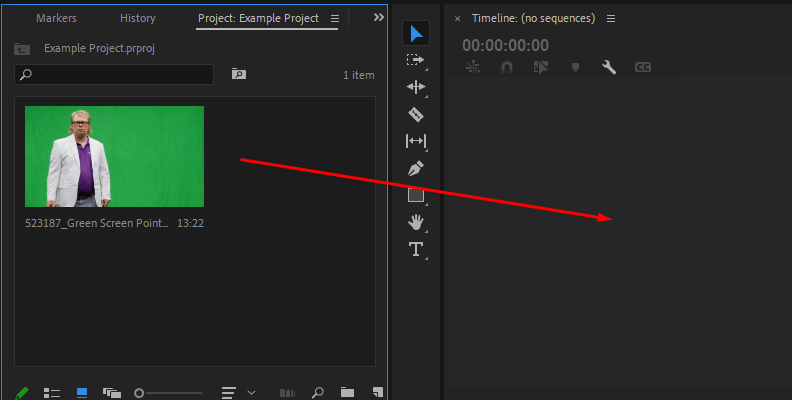
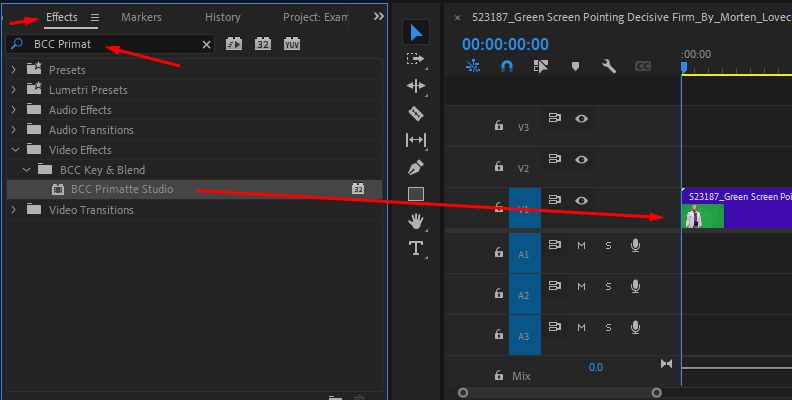
When you apply the filter, you’ll see the on-screen overlay, which helps speed up your workflow instead of going back and forth to the effects controls. However, some hosts do not support the on-screen overlay. In other hosts, you should have an option to enable it.
Step 2: Analyze the Green Screen Background
Click the Auto Analyze button in the on-screen tools or the effects controls to allow Primatte Studio to analyze the background image and find the best point for chroma keying. Primatte Studio generally performs well with auto analysis: it uses advanced image analysis tools to identify the blue or green screen work in the background and foreground colors.
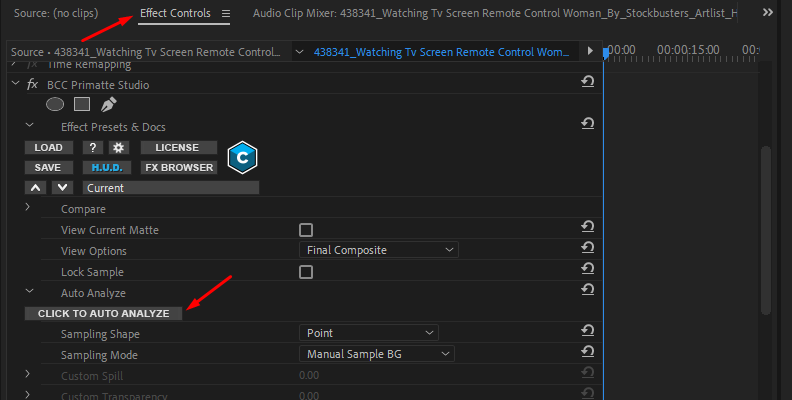
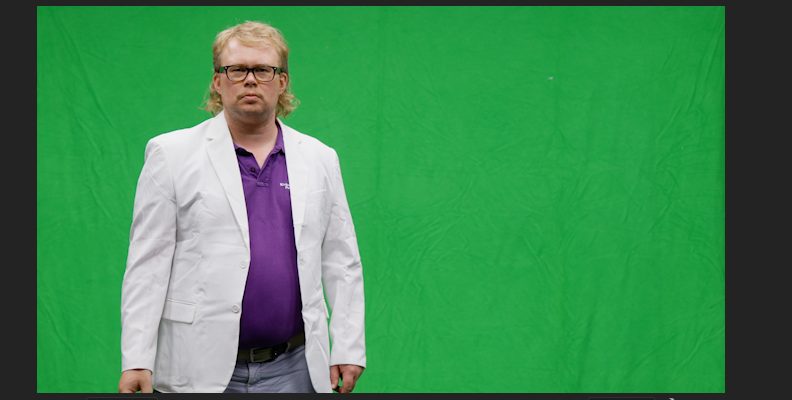
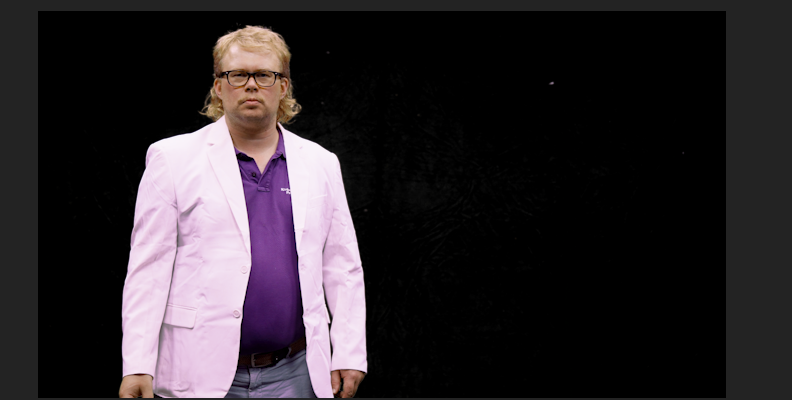
You can manually select the sample background color to remove by clicking “Man. Sample BG” on the screen tools or by choosing Manual Sampling BG from the Sampling Mode in the effects controls and clicking on the green screen or color to remove. Use the Point or Rectangle Sampling Shape to pick a sample from the green screen.
When working with video footage that’s not evenly lit, Primatte Studio has a feature called Adjust Light, which evens the background's lighting before chroma keying to produce a better matte.
You can preview the matte by selecting the Matte Status and Final Matte in the on-screen tools or using the Compare mode at the top of the effects controls. The Compare mode enables a split view to see the final matte against the composited image.
Step 3: Clean Up the Background
After analyzing the image, click Clean BG or change the Sampling Mode to Clean BG Noise in the filter settings.
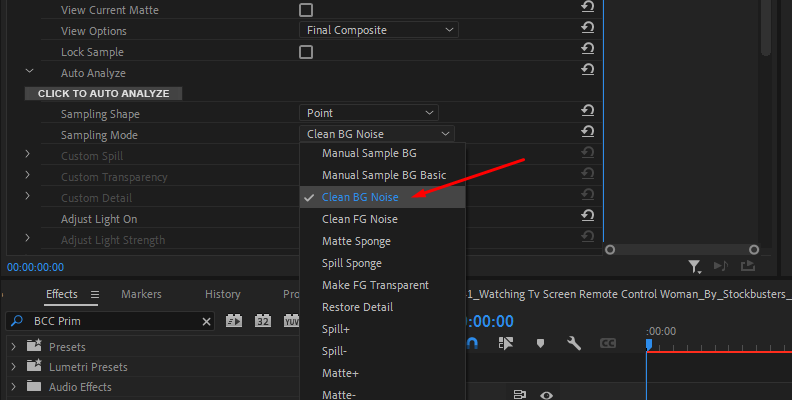
Change the View Options to Matte Status to see the in-progress matte. The Matte Status will show all transparent pixels in black, fully opaque pixels in white, and gray for semi-transparent pixels.
The Clean BG feature lets you clean the background to reduce the semi-transparent pixels and make them fully transparent. To use it, select a point or rectangle shape and click and drag over the grey pixels to turn them black.
Step 4: Clean Up Foreground
Cleaning the foreground works just like cleaning the background. Select the Clean FG mode, change the view to Matte Status, and click and drag over the grey pixels in the foreground to make them white. You can alternate the view to see how the clean-up affects the composite image.
Step 5: Spill Suppression
Spills occur when the bright green color from the green screen reflects on the subject or other reflective objects, causing the green color to appear where it should not, such as on glasses or clothing. Spill Suppression is a Continuum Primatte feature that allows you to reduce spills to create more authentic compositions when removing a green screen.
Click the Spill Sponge option in the on-screen toolbar or select Spill Sponge from the Sampling Mode dropdown menu. Click and drag over the areas where there are spills to correct them. Use the Spill- and Spill+ buttons to remove or restore spills in the image.
In the effects settings, there is a Spill parameter where you can adjust the Spill Replace Mode and the amount and use a secondary spill remover.
Step 6: Refining the Matte
Check the Refining Matte box in the parameters to enable the parameters to fine-tune the matte details.
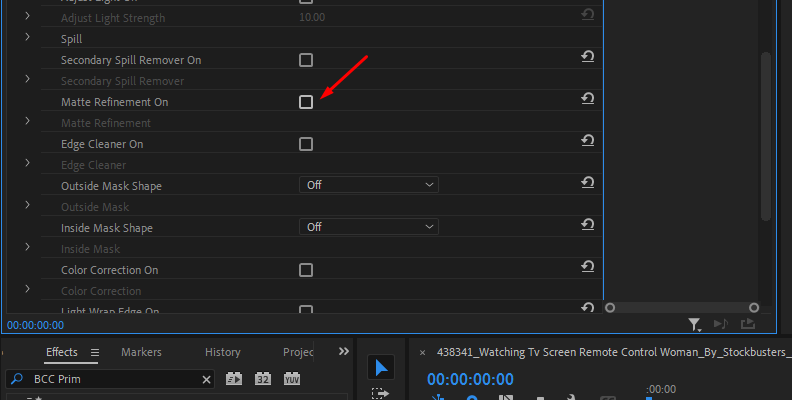
Adjust Soften Matte to smooth the edges, and use Soften Inward with Shrink and Grow to achieve a good matte and suppress inconsistencies with the transparency.
The Edge Cleaner setting provides spatial and temporal control to smooth edges and improve the details of your image, which is very helpful with hair or fur. If you need to create garbage mattes and hold mattes, the Outside Mask and Inside Mask parameters give you access to the Mocha planar tracker. Mocha offers advanced masking and tracking tools for keying complex scenes.
Step 7: Compositing the Result
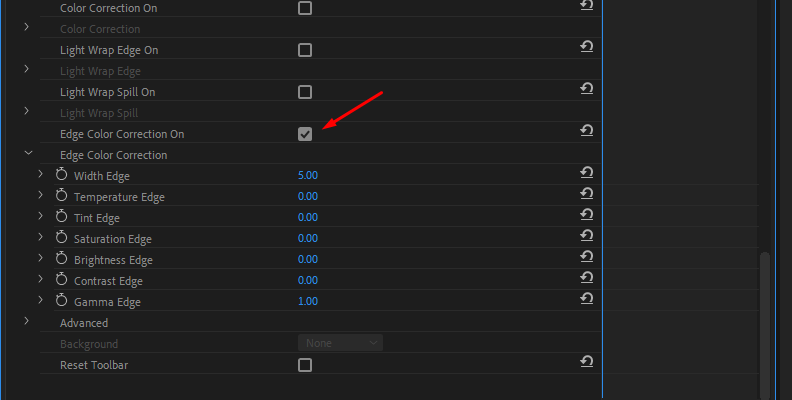
To add final touches, Continuum Primatte Studio provides tools for color correction to help you blend the foreground with the new background in your video. Use in conjunction with the Edge Color Correction group to work with the pixels in the edge and the Light Wrap options to blend the background light with your foreground image.
Pros and Cons of Using Continuum Primatte Studio
Now that you know how to use Continuum Primatte, let’s discuss the pros and cons of using it.
Here are the reasons to use Continuum Primatte Studio:
Automatic green or blue screen analysis to speed up the chroma key effect.
On-screen UI for a guided workflow.
Manually fine-tune the matte.
Integrated Mocha for masking and tracking.
Built-in color correction tools.
Tools to even background lighting.
Advanced spill suppressor.
Compare mode.
Multi-host.
And here are the reasons to avoid Primatte Studio:
Not available for Final Cut Pro.
Resource intensive.
Only available as a plug-in.
Final Words
Continuum Primatte Studio is an easy-to-use tool for experienced video editors. It offers many tools to remove green screens, refine the key, and blend the final composite. Additionally, it provides a quick and easy-to-follow workflow for beginner video editors and content creators.
Primatte Studio is available bundled with the Continuum subscription starting at $25 monthly (it varies depending on your host).
Download a free trial of Continuum to explore all the filters, including Primatte Studio, to edit your own green screen footage.
Good luck!
FAQ
Can Quality of My Footage Drop After I Remove/Replace Background?
Yes, the quality may drop, but green screen removal may not be the only reason. It may result from a low-definition source video or a poor chroma keying process that adds artifacts and causes jittery edges. To avoid losing quality, shoot in high resolution, take your time polishing the key for clean green screen removal, and use a professional chroma key tool. Primatte Studio offers refining tools to ensure your final result is of the highest quality.


