There are many different skills a video editor needs to have a great project at the end of the day. Understanding all the technicalities of video editing requires a lot of patience, trial and error, and knowledge is required to ensure the best results.
Knowing the fundamentals will stand any video editor in good stead, and one of the basic ones to understand is the aspect ratio.
What Is the Aspect Ratio in Video Editing?
Understanding what an aspect ratio is helps you to know how to work with them.
At its simplest, the aspect ratio is the relationship between the height of an image and the image's width.
This can be expressed either as a frame aspect ratio itself, such as 16:9 or 4:3, or it can be expressed as the resolution of the image in pixels, such as 1920x1080. However, regardless of which method is used, it is always the width first, then the height of the image.

The aspect ratio affects how we interpret the footage which has been recorded. This means it can be invaluable not only to understand how this affects the viewing experience but also how to change aspect ratios in existing footage so you can get the result you want from what you have shot.
While there is a lot to learn about aspect ratio, the basics are simple.
Aspect ratios are the ratio between width and height - if you remember that, you can't go wrong!
How To Change Aspect Ratio in Premiere Pro
It isn't too difficult to change aspect ratios in Premiere Pro, and the software makes it easy for you. You can do this by creating a new sequence, clicking on settings, and then adjusting the frame size.
-
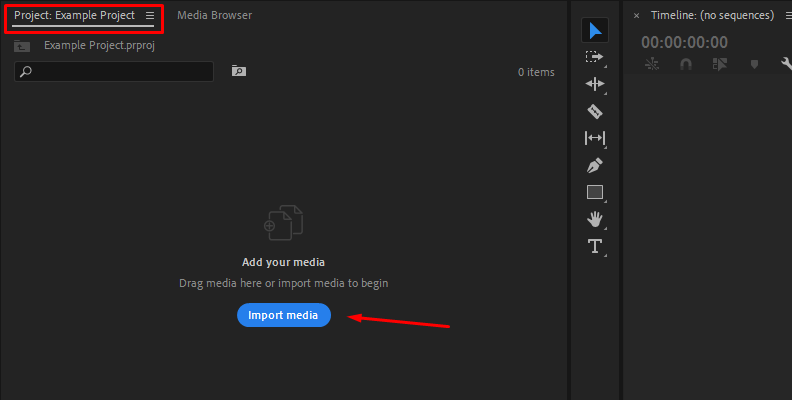
Import Footage
First, open the project you are working on if it is an existing project. Otherwise, import your footage into a new project so that you can work on it.
Once this has been done, you need to create a new sequence. To do this, go to File, then New, then Sequence.
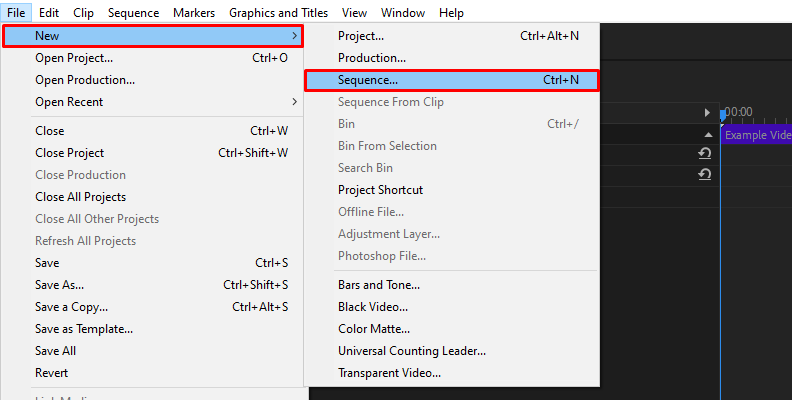 Keyboard shortcut: Ctrl + N (Windows) or Command + N(Mac)
 -
Choose a Preset
After this, you're going to need to choose a preset for the desired aspect ratio you need in the pixel aspect ratio section.
There is a list of different aspect ratios available here, and you can either choose one that suits the project you are working on or you can manually configure it. Clicking on Editing Mode will allow you to use presets or manually enter an aspect ratio.
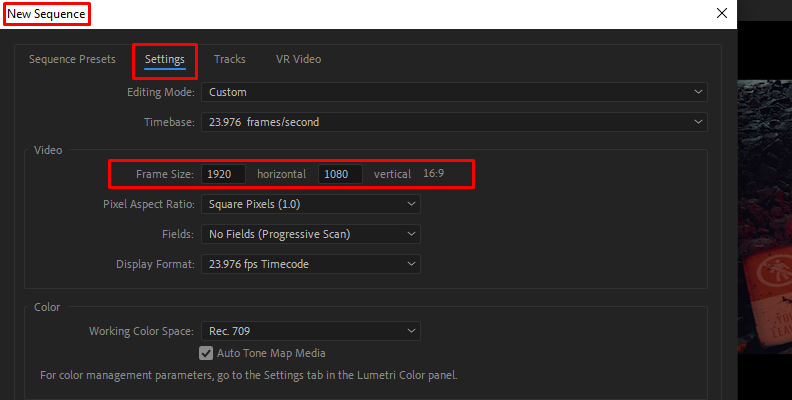
After this, click on the Settings tab in the same window. Premiere Pro will display the original aspect ratio of your footage.
-
Frame Size
Enter the new width and height that you want in the Frame Size option. However, for the most part, you will be fine working with the presets - pretty much everything you're going to require to choose the correct aspect ratio is there.
It's a good idea to decide what aspect ratio you might want prior to this, as it will save a lot of time trying out one aspect ratio after another.
However, Premiere Pro makes it easy to play around and try aspect ratios until you find the one you want.
-
Sequence Creation
When you have chosen the new aspect ratio you require, you need to finish the Sequence Creation. Click on OK, and in the sequence settings box that opens, give your sequence a name and save it to your computer.
And that's it done! You can now change the aspect ratio in Premiere Pro.
-
Add a Letterbox Effect in Premiere Pro
If you want to add a letterbox effect to some footage without changing the aspect ratio, Premiere Pro makes this easy to do as well.
-
Letterbox Effect
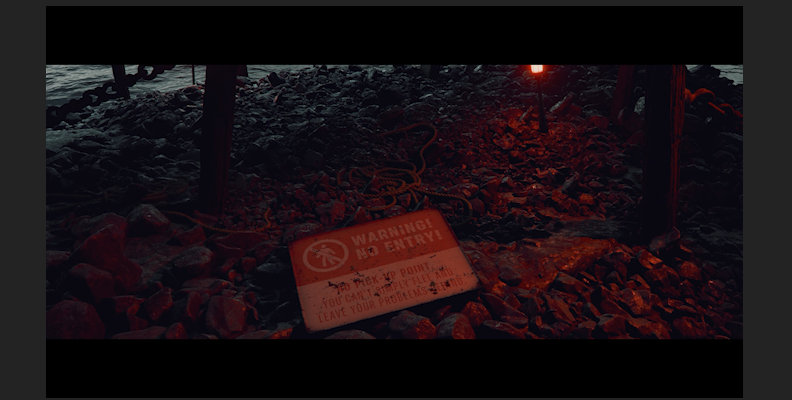
Letterboxing is just adding black bars at the top and bottom of your footage. It's an effect that is instantly recognizable.
You might want to do this if you've shot some footage that you want to make look more cinematic without actually affecting the composition of what you have already recorded.
But whatever the reason, Premiere Pro will help you add the letterbox effect.
Importing Your Footage
First, open Adobe Premiere Pro and create a new project. You can do this by going to the File menu, then New, then Project.
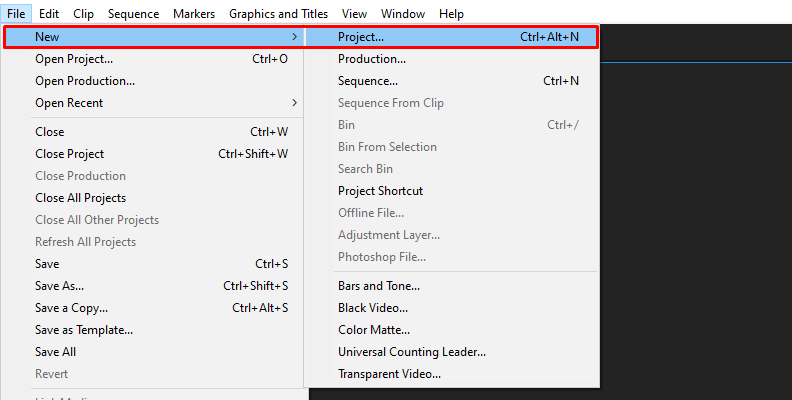
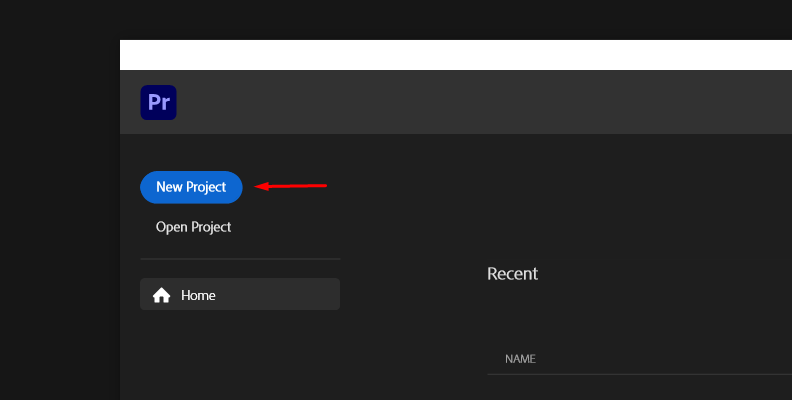
Or just click "New Project" in the home screen when you first launch the software.
Import the footage you want to work on by going back to the File menu and then choosing Import.
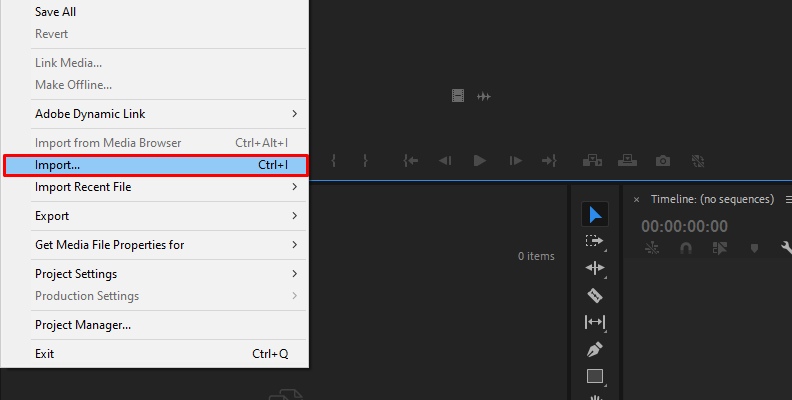 Keyboard shortcut: Ctrl + I (Windows) or Command + I (Mac)
Alternatively, you can just drag and drop your footage into the Project panel, or use the "Import" button in the same panel.

Once your footage is there, drag it to the Timeline panel.
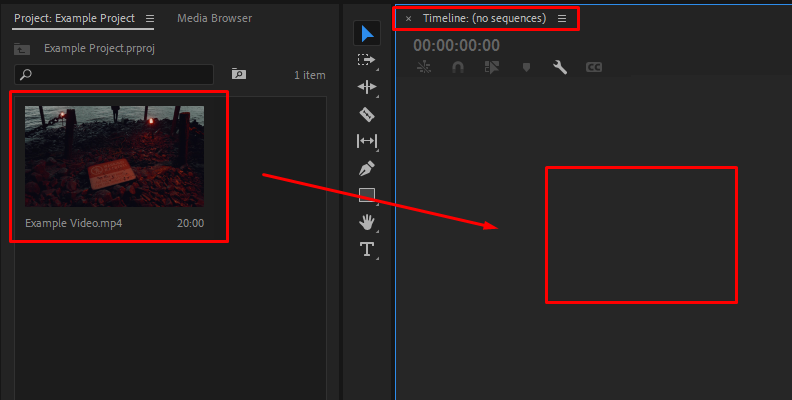
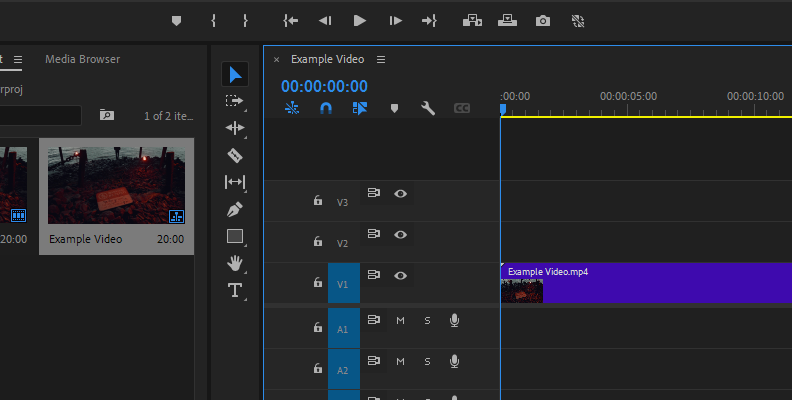
If you're working on one clip, then you're good to proceed; if you are working on multiple clips, then arrange them in sequence before proceeding.
-
Adjustment Layer
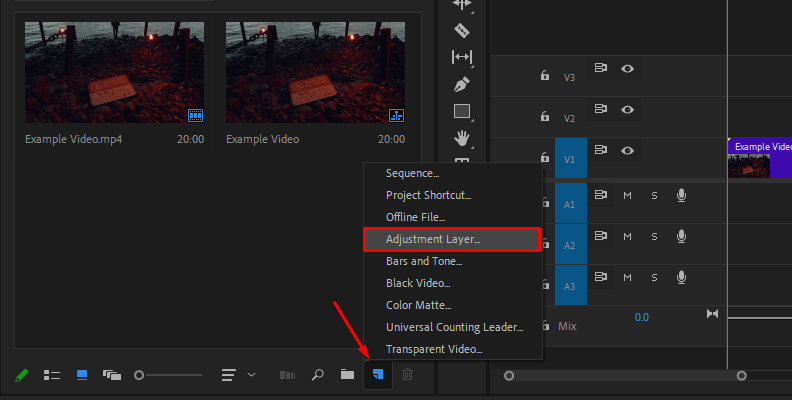
Now, you need to create a new Adjustment Layer. To do this, go to the Project panel and click on the New Item at the bottom right-hand side of the panel - it's the one next to the trash can that looks like a sheet of paper with a corner folded.
Once you have clicked this, select Adjustment Layer from the menu.
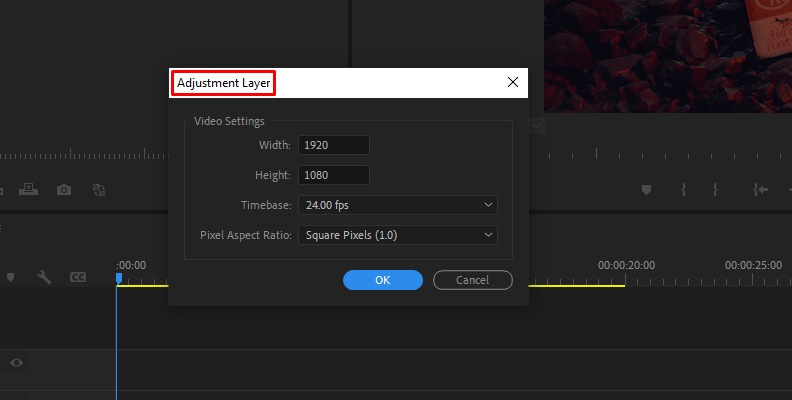
This will open an Adjustment Layer dialogue box. Confirm that the settings here match the ones of your project, then click on OK.
Once this has been done, you need to drag this layer from the Project panel to a new track in the Timeline above your clips.
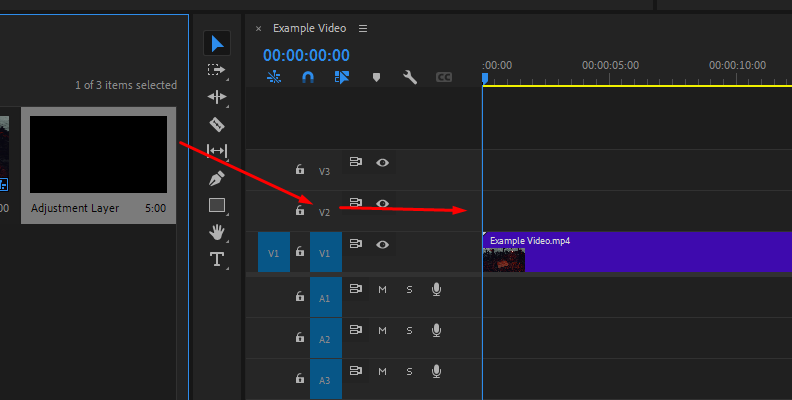
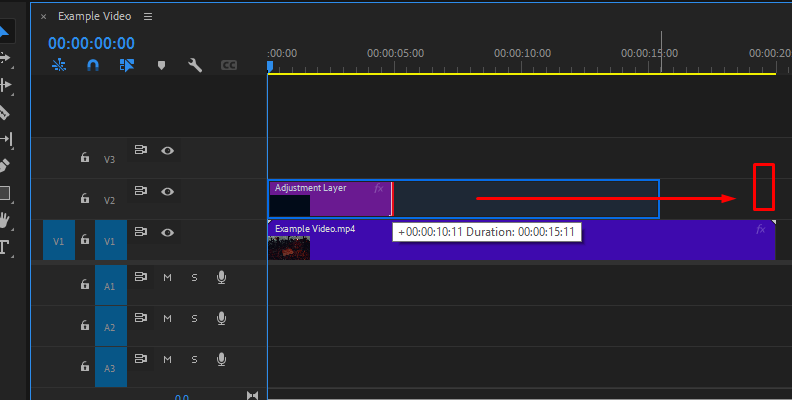
Drag the adjustment layer across all of the clips or just the clips to which you want the letterbox effect applied. You can do this by left-clicking the end of the track so that it covers all of the clip or clips you want the effect applied to.
-
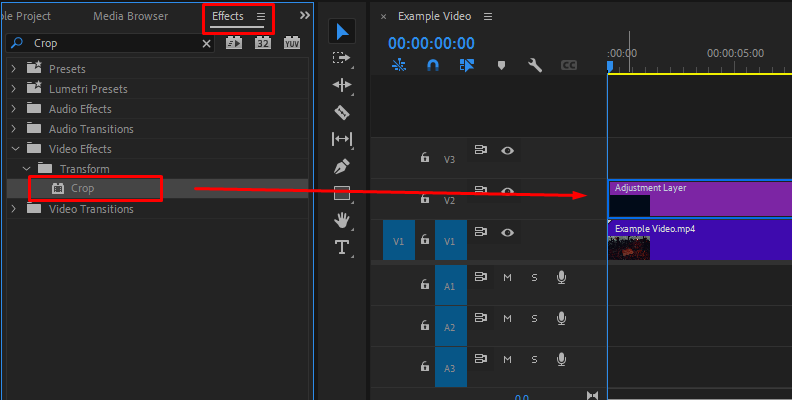
Crop Effect
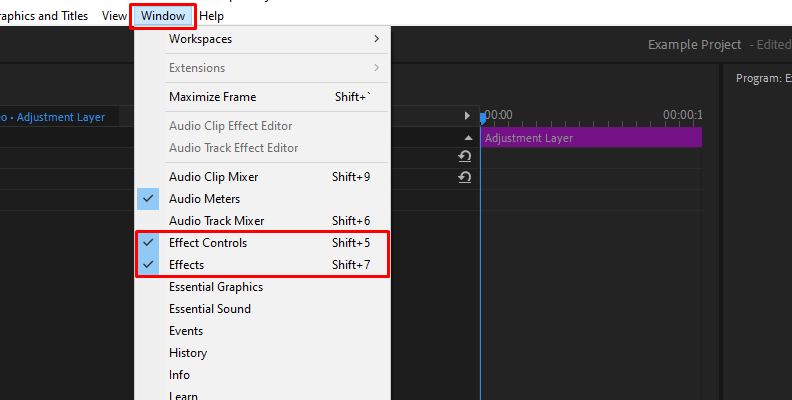
You then need to apply the Crop effect. Select the adjustment layer in the timeline, then go to the Effect Controls panel. But first, you need to ensure the "Effect Controls" and "Effects" panels are activated in your Premiere Pro.
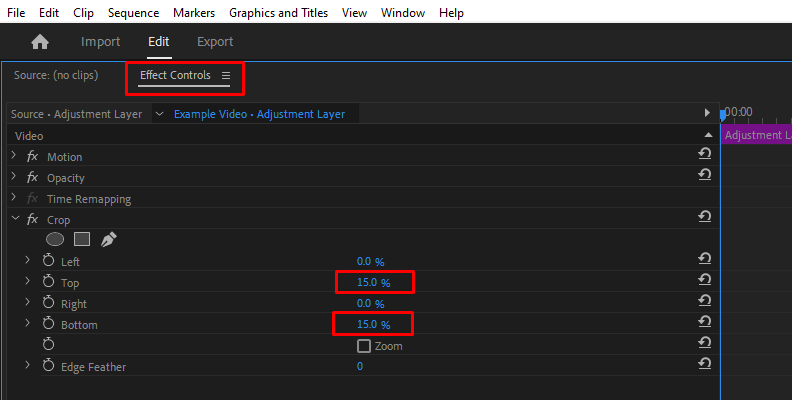
Under the "Crop" option, change the Top and Bottom percentages to adjust the size of the letterbox effect you want to apply to your footage. Generally, anything in a 10-15% range should give you good results, but experiment a little until you find a level you are happy with.
 You may also like: Step by Step Guide: Crop a Video in Premiere Pro
 -
Export Video
Firstly, play back your video to confirm that you are happy with the changes you have made to them. If not, undo the changes and go through the steps again until you get the result you want.
Then go to File, then Export, then Media.
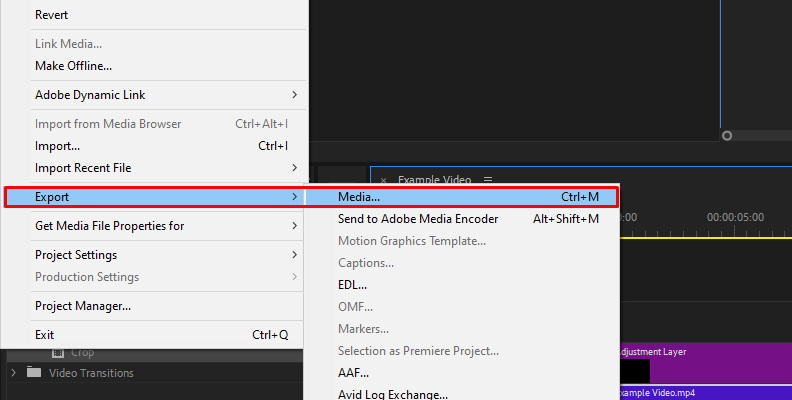
Choose the format you want to be saved in, name it, then click Export. Premiere Pro will then export your video for you.
You may also like: Export Video from Premiere Pro -
Common Aspect Ratios
The aspect ratio is actually more accurately referred to as a pixel aspect ratio, and there are various different aspect ratios that can have a different impact on how we interpret the footage that is being seen. We see these aspect ratios every day, sometimes without even realizing it.
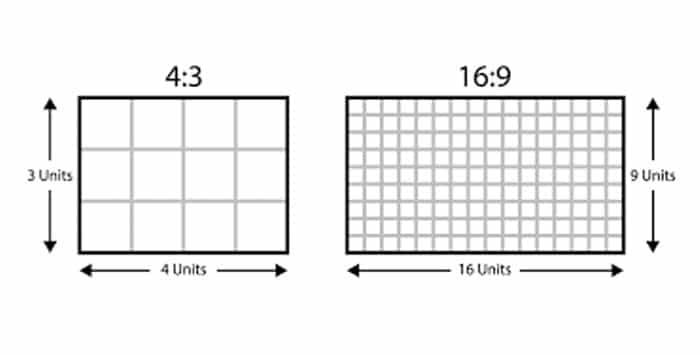
If you think of a movie, it is longer at the top than it is at the sides - this is a 16:9 aspect ratio, usually just referred to as widescreen. The 16 refers to the width, and the 9 refers to the height.
Old TV shows used a 4:3 aspect ratio (also known as standard), so the image is slightly wider than it is high, though not by much.
A 1:1 aspect ratio is a perfect square. "Vertical video", recorded on a phone, has an aspect ratio of 9:16. There are plenty more besides these, but this at least covers the basics.
Each of these has a distinctive characteristic that audiences respond to and aspect ratios can be utilized to convey different approaches.
Seeing something shot in a 4:3 aspect ratio makes people think of older TV shows (or very old movies), so it can be used to invoke a sense of the past or nostalgia.
16:9 makes people feel that what they're watching is newer and more cinematic, whereas seeing something recorded at 9:16 on a phone might make things appear more spontaneous or naturalistic. It's also a better fit for social media posts.
There are a number commonly used aspect ratios. In the below table, the first aspect ratio is how the aspect ratio is usually referred to.
The second aspect ratio is the one-to-one relationship of the ratio - these are both frame aspect ratios.
The width and height columns are the resolutions expressed in pixels and is a pixel aspect ratio.
| Image Type | Aspect Ratio | Aspect Ratio | Width | Height |
| Pre-widescreen TV | 4:3 | 1.33:1 | 1920 | 1443 |
| Widescreen 1080p | 16:9 | 1.78:1 | 1920 | 1080 |
| Widescreen 4K UHD | 16:9 | 1.78:1 | 3840 | 2160 |
| Widescreen 8K UHD | 16:9 | 1.78:1 | 7680 | 4320 |
| IMAX Widescreen (4K UHD) | 1.43:1 | 3840 | 2685 | |
| Square | 1:1 | 1:1 | 1080 | 1080 |
| Social Media (Instagram Stories, YouTube Shorts, TikTok etc) | 9:16 | 0.56:1 | 1080 | 1920 |
Final Words
There can be many reasons to change the aspect ratio of your footage. Maybe you need to achieve a particular look or effect, maybe you simply want to experiment with different looks, or even just prepare a specific aspect ratio so footage can be uploaded to social media.
Whatever the reason to change aspect ratios, Premiere Pro makes it easy for you to get the correct aspect ratio you require.
FAQ

Is 1920x1080 the Same As 16:9?
The answer to that question is that it can be the same, but it doesn't have to be. Don't worry, it's not as confusing as it sounds! It's just a question of understanding exactly what it is these numbers refer to.
If you take a look at the table of aspect ratios above, you can see that there are three different image types, which have 16:9 next to them, but only one aspect ratio has 1920x1080 next to it.
Frame Aspect Ratio
16:9 refers to the width and height of aspect ratios. This is known as a frame aspect ratio because it is the aspect ratio of the frame of the screen, regardless of resolution. It is, basically, the frame size.
That means any aspect ratio that is 16 wide by 9 high can thus be referred to as a 16:9 aspect ratio. This is regardless of the resolution of the footage, as it's the ratio of the frame on screen.
Pixel Aspect Ratio
However, the 1920x1080 aspect ratio is what is known as a pixel aspect ratio. A pixel aspect ratio is specific to the number of pixels in the resolution of the footage and so is unique to that.
In this way, we can see that 1920x1080 must always be a 16:9 aspect ratio because that is a fixed ratio but that 16:9 can be other pixel aspect ratios as long as they maintain a 16:9 ratio.
And now you know how to change aspect ratio in Premiere Pro as well as how aspect ratios relate to each other.