The kaleidoscope effect is a creative visual technique that transforms ordinary footage into stunning symmetrical patterns, much like looking through a real kaleidoscope.
It’s a favorite among many video editors for adding a surreal, artistic flair to music videos, experimental films, or abstract sequences.
While Adobe Premiere Pro doesn’t have a built-in kaleidoscope effect, you can easily recreate it using native tools like the Mirror and Transform effects.
In this guide, you’ll learn how to build your kaleidoscope effect from scratch in Premiere Pro, step by step, and discover tips for maximizing its visual impact in your projects. Without further ado, let's get straight into it!
What is the Kaleidoscope Effect?
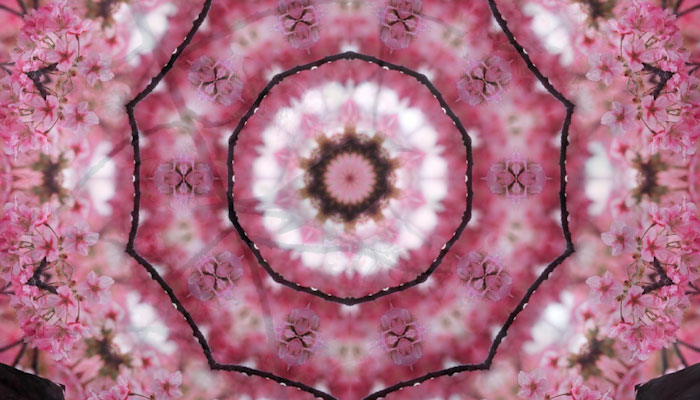
The kaleidoscope effect in video editing is a visual technique that mirrors and rotates parts of a video frame to create symmetrical, abstract patterns—similar to the view inside a physical kaleidoscope. By taking fragments of the original footage and duplicating them around a central axis or point, the effect generates mesmerizing visuals that often resemble mandalas, geometric designs, or surreal reflections.

In video editing software like Adobe Premiere Pro, the kaleidoscope effect isn't a native preset but can be recreated using a combination of tools such as Mirror, Transform, Rotation, and Tiling effects. Editors use these to flip or repeat parts of a clip, layering them in symmetrical patterns that rotate or animate over time. This technique can add an artistic or psychedelic look to music videos, motion graphics, experimental films, or visual backdrops.
One of the key appeals of the kaleidoscope effect is how it transforms ordinary footage into something completely abstract. A simple clip—such as someone walking, clouds moving, or water rippling—can become a complex, hypnotic design with the right setup. Because it works by repetition and symmetry, the final result can evoke feelings of harmony, disorientation, or visual intrigue depending on the design.
This effect is often paired with ambient music, slow motion, or vibrant color grading for added impact. While it’s visually striking, it should be used intentionally, as overuse can overwhelm the viewer or distract from the main subject. Whether used subtly or as a dominant visual motif, the kaleidoscope effect is a powerful tool for editors looking to break away from traditional footage and explore more experimental aesthetics.
How to Create a Kaleidoscope Effect in Premiere
-
Step 1: Import and Prepare Your Footage
Start by importing your clip into the Premiere Pro timeline. Make sure it’s trimmed and ready to be duplicated or transformed. -
Step 2: Create a Nested Sequence
Right-click on your clip in the timeline and choose Nest. This will group the clip into a new sequence. Name the nested sequence something like "Kaleidoscope Base."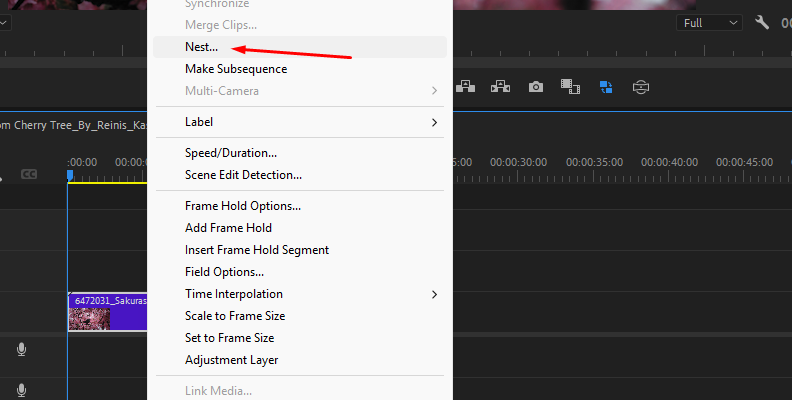
-
Step 3: Apply the Mirror Effect
Open the Effects panel and search for Mirror, which is located under Video Effects > Distort. Drag and drop the effect onto your nested clip.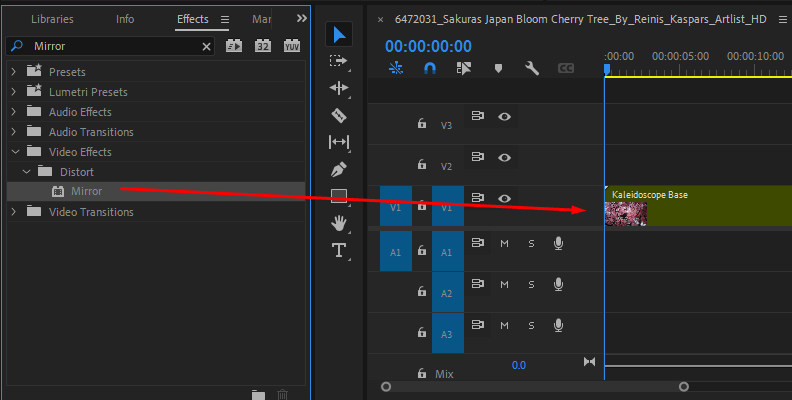
-
Step 4: Adjust the Mirror Settings
In the Effect Controls panel, set the Reflection Center and Reflection Angle to define the axis of symmetry. Start with a 90° angle to create a vertical reflection.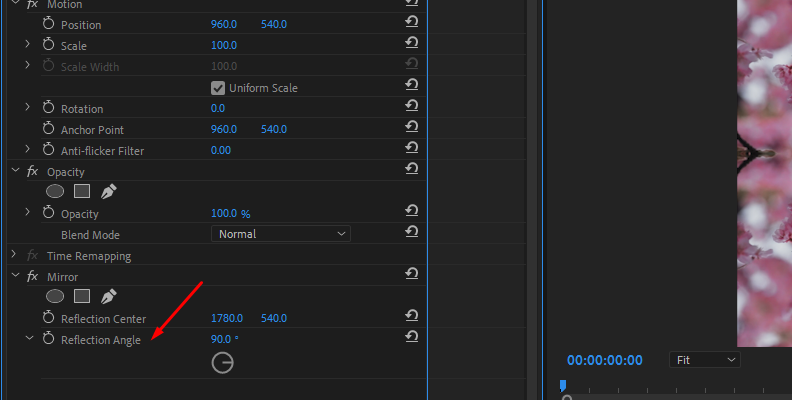
Then, duplicate the nested clip by holding Alt and dragging it upward to create a new layer in the timeline.
-
Step 5: Rotate and Re-Mirror
On the duplicated clip, change the Mirror Angle to a different value—like 45° or -45°—to introduce a new axis of reflection. Adjust the Reflection Center as needed to align the symmetry with your original layer. You can repeat this process, stacking three to six mirrored layers, each with unique angles, to build a more intricate pattern. -
Step 6: Nest Again for Cleanup (Optional)
After layering and aligning your mirrored clips, select them all, right-click, and choose Nest again. This step tidies up your timeline and makes it easier to apply overall effects. -
Step 7: Add Transform for Animation (Optional)
To animate the kaleidoscope, apply the Transform effect to your final nested sequence. In the Effect Controls, uncheck "Use Composition Shutter Angle" and set a custom Shutter Angle, such as 180°, to enable motion blur. Then, keyframe the Rotation parameter to make your kaleidoscope slowly spin over time.
How to Create a Kaleidoscope Effect in Premiere Pro With Continuum's BCC Kaleida Dissolve
When it comes to enhancing your videos and taking them to a whole new level, Continuum's creator pack is here to help you in any imaginable way.
Continuum is a product by Boris FX designed to help video editors and enthusiasts save lots of time when needing to create a specific look or effect for their content, without having to take the manual, step-by-step approach using built-in software tools. It's available for all popular video editing programs and there is a free trial version available for download.
In Continuum, you can find a filter, a transition, an effect, and a tool for anything you may need in the moment for a good edit.
The same applies to creating kaleidoscope effects. In Continuum, there's an effect called BCC Kaleida Dissolve, and you can apply it to your video clip to create mind blowing, abstract visuals for your video projects.
Here's what you need to do:
-
Step 1: Import Your Video And Place It On The Timeline
The first step, as in the section above, is to import the video you want to apply the effect to into your project and then place it on the timeline. When it's ready, apply the BCC Kaleida Dissolve Effect.
-
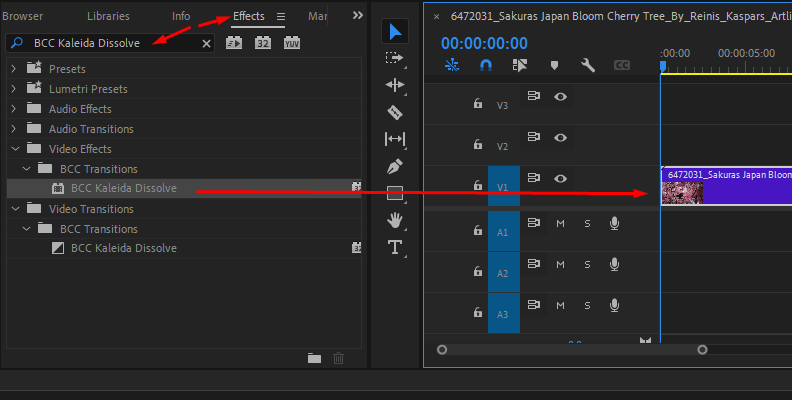
Step 2: Apply The BCC Kaleida Dissolve Effect
To find the BCC Kaleida Dissolve effect, you need to have Continuum installed for your software of choice. Then, if it's properly installed, you will be able to see all Continuum effects in the Effects panel.
Simply use the search bar to look up the effect, and then drag it straight to the clip on your timeline. There is no need for an adjustment layer.
-
Step 3: Choose A Preset Or Manually Modify Parameters
Now that the effect is applied, open the "Effect Controls" panel and click the "FX Browser" button.
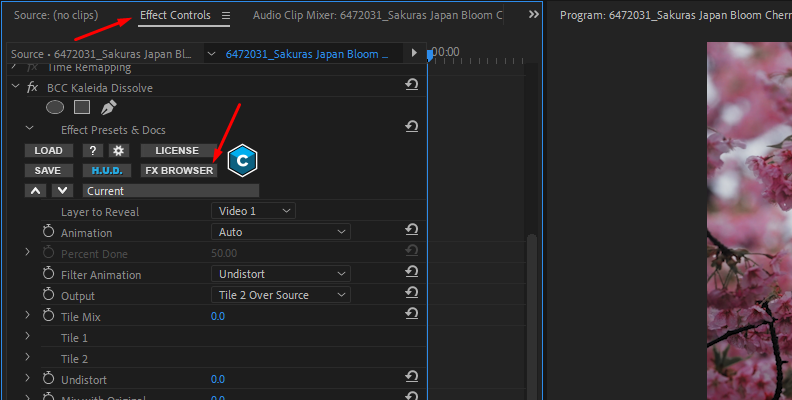
Here, you will be able to find many presets.
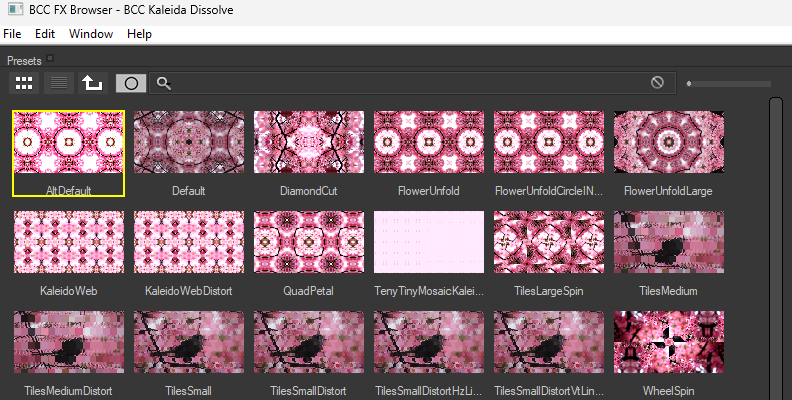
Choose the preset you want based on whether you want a basic kaleidoscope effect or something that morphs into a mind blowing abstract shape.
Upon finding the preset you want, simply click the "Apply" button in the bottom-right corner.
That's how easy it is to create a kaleidoscope effect with Continuum by Boris FX!

You can always choose to fine-tune and customize your effect manually, and make it look like it's a part of a whole new effects collection, different from the offered presets, but this is the quickest and most user-friendly way to get to a kaleidoscope effect.
Final Words
That covers everything you need to know about creating the kaleidoscope effect in Premiere Pro, both using the built-in tools, which is a method that is more time-consuming and doesn't offer much customization freedom, and by using the Continuum creator pack.
We wish you the best of luck, and thank you for reading!
FAQ
Is Kaleidoscope Effect Included in Premiere?
The kaleidoscope effect is not included by default in Premiere Pro, but in this tutorial, you can learn how to create it step-by-step using the built-in tools in this popular video editing software.
Can I Animate the Kaleidoscope Effect?
Yes, you can animate the kaleidoscope effect, and we cover that in the first section, though by using the built-in tools only, it will be a time-consuming process - where using a plugin like BCC Kaleida Dissolve automatically animates.