Without a doubt, technology is advancing at a rapid pace, and some of the things we considered mindblowing just a few years ago are now part of our daily lives.
When it comes to 360 videos, they have a lot to offer, both within and outside of the VR (Virtual Reality) world.
In this guide, we'll talk about 360 videos, what they are, what purpose they serve, and most importantly, how to edit them within one of the world's most popular video editing programs, Adobe Premiere Pro.
If you are willing to learn more on this topic, you've come to the right place, so without further ado, let's get straight into it!
What is a 360 Video?
360 video footage refers to an immersive type of video that captures a complete 360-degree view of a scene. It allows viewers to look in any direction—up, down, and all around—as if they were present in the environment. This is achieved using special cameras equipped with multiple lenses or through stitching footage from multiple cameras together.
Viewers can interact with 360 videos by dragging their perspective on a screen, using VR headsets for an immersive experience, or tilting their mobile devices to explore the scene. It’s widely used in virtual reality (VR), interactive storytelling, tours, and immersive marketing.
Here are some great examples of use-case scenarios for 360 footage.
- Real Estate Virtual Tours Potential buyers can explore properties remotely, experiencing every room and detail as if they were there in person.
- Travel and Tourism Offer immersive previews of destinations, hotels, or attractions to entice travelers. For example, virtual safaris or historical site tours.
- Education and Training Simulate real-world environments for training in fields like healthcare, aviation, or manufacturing. For example, VR surgery practice or pilot training.
- Event Experiences Allow people to attend concerts, sports events, or conferences virtually. VR lets them feel like they're in the audience.
- Retail and Shopping Create virtual showrooms where customers can explore and interact with products before buying, enhancing online shopping experiences.
- Entertainment and Storytelling Offer immersive narratives in film, gaming, or documentaries that let viewers experience the story from different perspectives.
- Architectural Visualization Architects can showcase designs and spaces in an interactive 360-degree format, helping clients visualize the end product.
- Training Simulations Industries like military, firefighting, and law enforcement use VR videos for realistic, risk-free training scenarios.
- Healthcare and Therapy VR videos are used for mental health treatments, like exposure therapy for phobias, or to help patients in physical rehabilitation.
- Fitness and Wellness Engage users with VR workouts or mindfulness experiences in serene, immersive environments.
- Cultural Preservation Digitally capture and share endangered landmarks, cultural rituals, or historical events for educational and preservation purposes.
- Product Demos Showcase complex machinery or products in action, offering a close-up, interactive look at their functionality.
Things You Should Do Before Editing 360 Video
If you want to learn how to edit 360 video in Premiere Pro, there are first a few steps you need to take to ensure your material is set to enter the editing stage.
Stitch Your Footage
If your 360 camera records with multiple lenses, you’ll likely need to stitch the footage together using software like Insta360 Studio, GoPro Player, or software provided by the camera manufacturer. Ensure the stitching is seamless to avoid visible lines or distortions.
Check Camera Orientation
Correct any horizon tilt or camera misalignment to ensure the video is level. Misaligned footage can disorient viewers and complicate edits.
Convert to Equirectangular Format
Ensure the footage is in the standard equirectangular projection (2:1 aspect ratio) for compatibility with editing software like Premiere Pro.
Remove Unwanted Elements
Look for and address any unwanted objects in the footage, such as the tripod or gear, using software or masking techniques.
Set the Metadata
Confirm that your video includes 360 metadata so editing software recognizes it as 360 footage. Tools like Spatial Media Metadata Injector can help if metadata is missing.
Review and Organize Clips
Watch all your raw footage to identify usable parts. Organize your files into folders based on scenes or sequences to simplify the editing process.
Backup Your Files
Create copies of your original footage and store them securely. Editing can corrupt files if something goes wrong, and backups ensure you don’t lose your work.
Color Correct and Sync Cameras
If using multiple cameras, color-correct individual clips and synchronize them to match exposure, white balance, and other settings.
Plan Your Storyline
Map out how you want your video to flow. Note key transitions, points of interest, or interactive elements you may want to include.
Test Playback
Use a VR headset or 360-compatible player to preview your footage. This helps identify distortions, stitching errors, or areas needing improvement before starting edits.
Editing 360 Video in Premiere Pro

Step 1: Import Your 360 Video
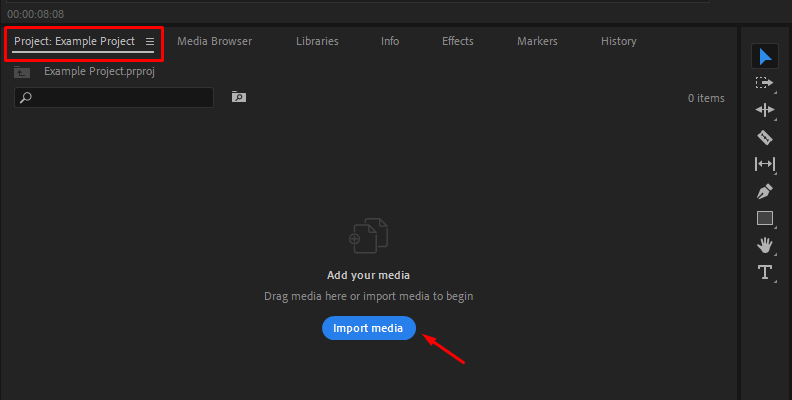
Open Adobe Premiere Pro 2024 and create a new project.
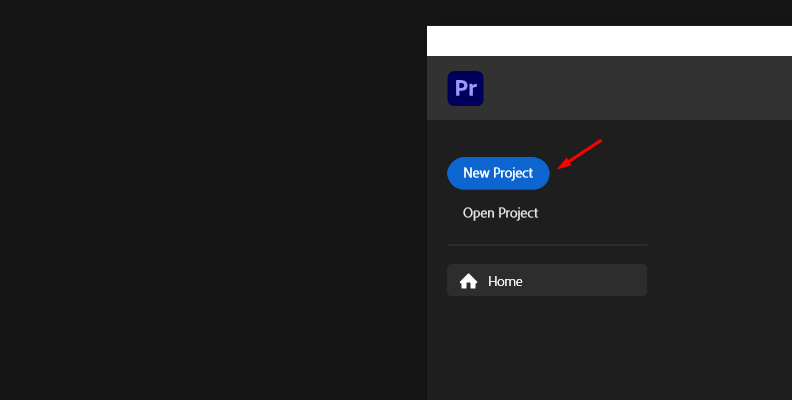
Import your 360 video file by dragging it into the media bin or using the File > Import option. Ensure the video is in the equirectangular format (a 2:1 aspect ratio), which is the standard for 360 videos and VR footage.
Step 2: Create a 360-Compatible Sequence
Drag the imported video onto the timeline to create a sequence and begin your VR editing. Confirm the sequence settings match the video resolution and frame rate. Most 360 videos are either 4096x2048 or 3840x1920 pixels.
Step 3: Enable VR Video Display
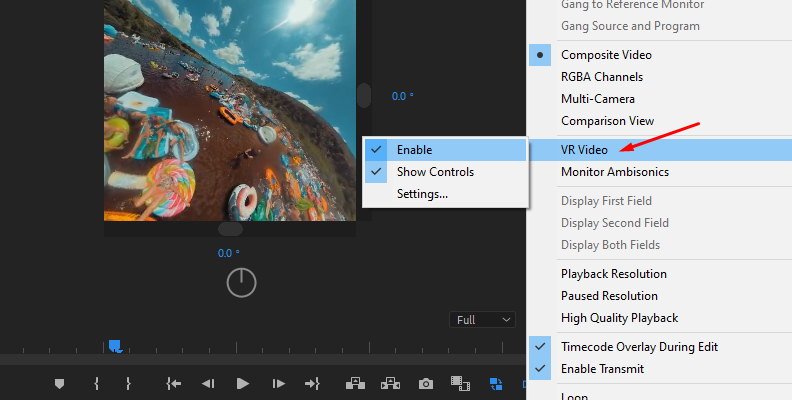
To preview your video in 360, click the Settings (wrench icon) in the Program Monitor and select VR Video > Enable VR Video Display.
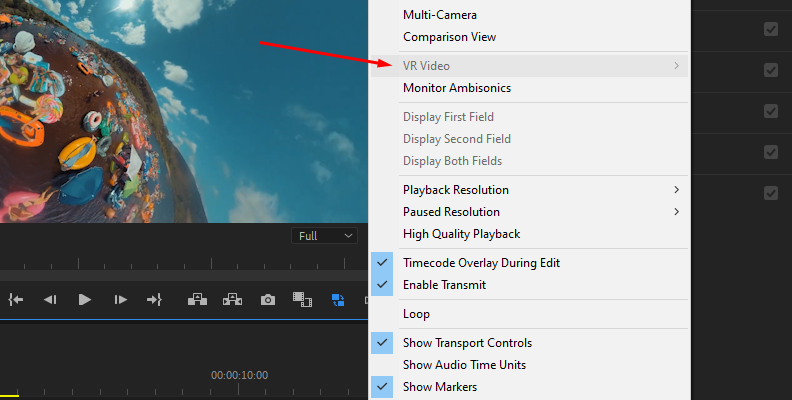
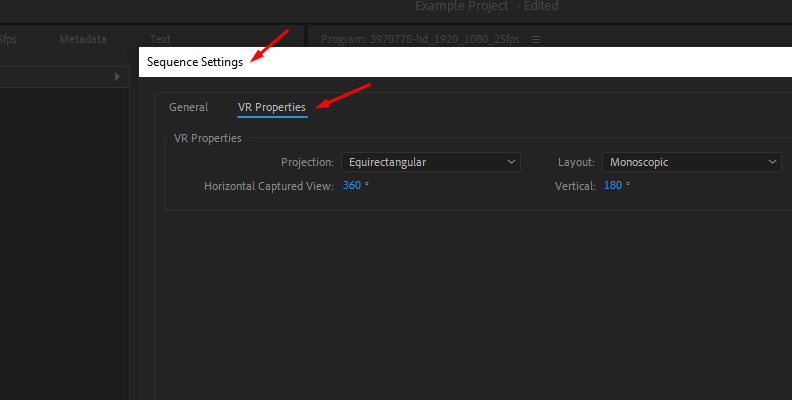
If the VR Video option is grey, as in the image below, go to Sequence -> Sequence Settings and navigate to the VR Properties Section. Choose a projection and confirm the changes.
Step 4: Perform Basic Edits
Trim, cut, and arrange your clips as needed using standard editing tools in Premiere Pro. Use the Ripple Edit tool for smooth timeline adjustments and apply transitions like fades or cross-dissolves for seamless scene changes. Keep in mind that some effects, such as the popular Warp Stabilizer, will not work on 360 video footage.
Step 5: Reframe and Adjust Views
If you want to focus on specific areas within the 360 space, apply the VR Projection effect. Go to Effects > Video Effects > Immersive Video > VR Projection and adjust parameters like tilt, pan, and roll to control the viewer’s perspective dynamically.
You can proceed to color-correct or do further aesthetic modifications to your video. When done, the last step is to navigate to the export window, and in the video tab, choose your preferred settings, then export the video.
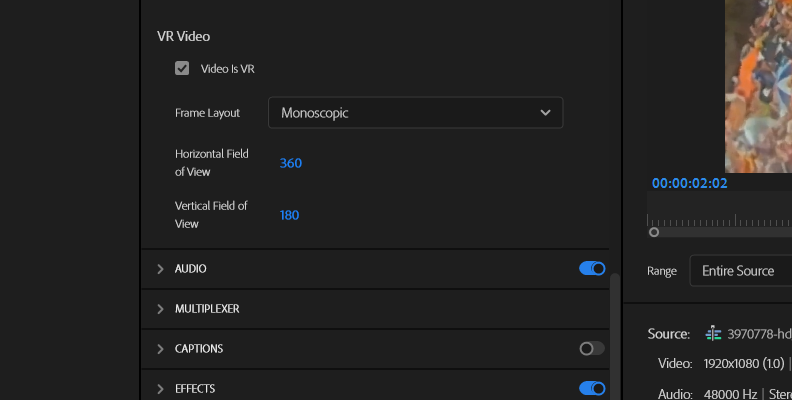
Keep in mind that some platforms, such as YouTube, require specific settings for optimal playback.
Editing 360 Video in Premiere Pro with BCC VR Tools
When it comes to making editing easier and a lot more intuitive, we always recommend third-party tools and plug-ins that are specifically designed for a task and with the user's experience in mind. For any VR mode editing that you want to do, we recommend BCC VR Tools, which is part of Continuum.
Continuum is a product by Boris FX, compatible with all popular video editing programs, meaning you can use its hundreds of tools, transitions, filters, and presets in your well-known working environment without having to switch and learn new software all over.

To use BCC VR tools, you need to install Continuum for your software of choice. You can install a free trial version and try all the tools without any issues, though your content will be watermarked upon export until you obtain a license.
Once Continuum is installed for your software, you'll find all effects and tools in the "Effects" tab as usual. They appear under "BCC VR".
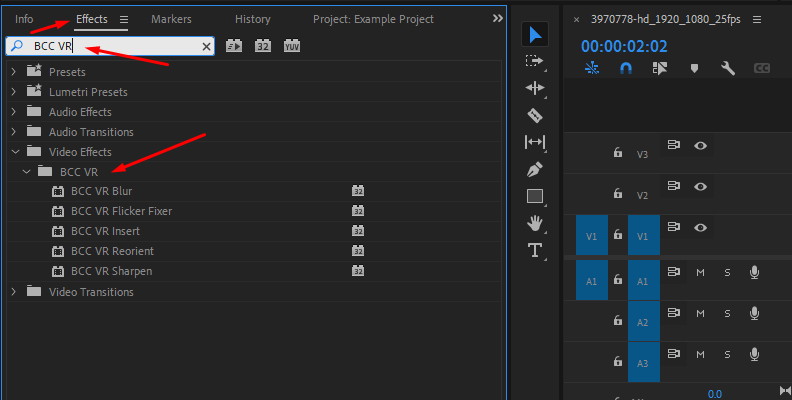
So, import your footage just like you usually do in Premiere Pro, then from the Project Panel, drag and drop the video you wish to edit onto the timeline to create a sequence. When you require any of the tools that BCC VR has to offer, feel free to drag and drop them onto your video from the "Effects" tab.
Once you drag and drop an effect, you can navigate to the Effect Controls panel and adjust any parameters until you get the visuals your project needs.
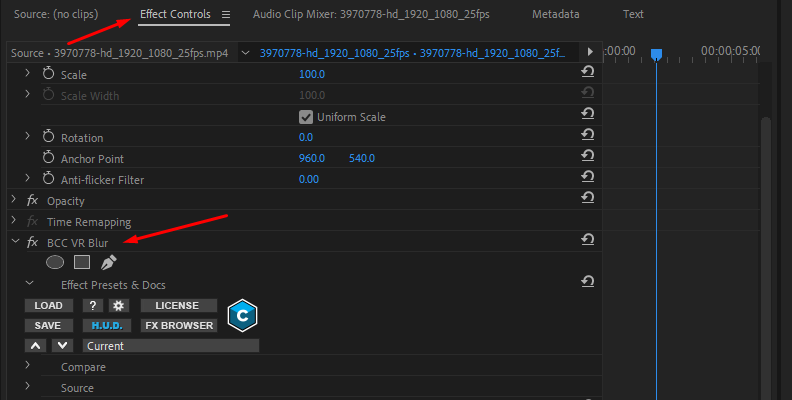
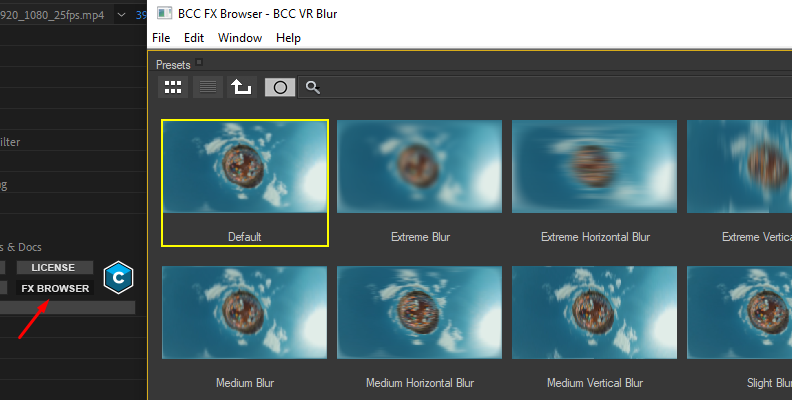
All Continuum effects are highly customizable, and you can even browse presets that are easily applicable with just a click (and can also be modified).
Monoscopic vs Stereoscopic Video: What are the Differences?
Here are the key differences between Monoscopic and Stereoscopic video. Mainly, they differentiate in the way they create the illusion of depth.
Monoscopic 360 Video
- Single Image Sphere: Monoscopic video uses a single equirectangular image for both eyes.
- No Depth Perception: Viewers can look around in all directions, but the scene appears flat without a sense of depth.
- Simpler Production: Easier to create and edit since only one video stream is used.
- Applications: Suitable for general 360 video content, such as real estate tours, virtual tours, or non-interactive storytelling.
- Hardware: Viewable on any 360-compatible device, including smartphones, VR headsets, or desktop players.
Stereoscopic 360 Video
- Dual Image Spheres: Stereoscopic video uses two separate images—one for the left eye and one for the right eye—to create a 3D effect.
- Depth Perception: Provides a more immersive experience with a sense of depth, making objects feel closer or farther away.
- Complex Production: Requires specialized cameras or rigs with multiple lenses to capture separate perspectives for each eye. Stitching and editing are more complicated.
- Applications: Ideal for VR experiences, immersive gaming, and scenarios where a realistic sense of presence is critical (e.g., VR training or simulations).
- Hardware: Best experienced with VR headsets that support stereoscopic playback.
| Feature | Monoscopic 360 Video | Stereoscopic 360 Video |
|---|---|---|
| Visual Output | Flat, no depth perception | 3D effect with depth perception |
| Number of Streams | Single image sphere | Two image spheres (left and right) |
| Production Complexity | Simple and straightforward | Requires more equipment and processing |
| Use Cases | General 360 content | Immersive VR experiences |
| Viewing Devices | Works on all devices | Best with VR headsets |
Final Words
Now you know more about editing a 360 video in Premiere Pro. Hopefully, this information will come in handy and help you improve all your upcoming video editing projects.
We wish you the best of luck, and thank you for reading!


