Learning how to fade out video in Premiere Pro is a basic but essential video editing skill. A clean fade out helps your video end smoothly, transition to a new scene, or visually signal the conclusion of one scene without an abrupt cut. Whether you’re creating content for YouTube, editing a short film, or working on professional videos, fades add polish and improve overall quality.
In Adobe Premiere Pro, adding a video fade is quick and flexible. You can use built-in video transitions like the popular cross dissolve, or manually adjust opacity for more control over the fade out effect.
This tutorial will walk you through the process step by step, showing you the easiest ways to add a fade and when to use each method for the best result.
What is a Fade-Out Effect in a Video?
A fade-out effect is a gradual visual transition where a video clip slowly disappears, usually into a black background, signaling the end of a scene or the conclusion of the entire video. Instead of cutting abruptly, the image gently fades until nothing remains on screen. This type of fade is widely used in video editing because it feels natural, cinematic, and easy for the viewer to process.
In practical terms, a video fade works by reducing the opacity of a clip over time. As the opacity decreases, the image becomes more transparent until it fully fades out. This is why fades are commonly associated with emotional closure, scene changes, or a calm ending. You’ll often see a fade out effect at the end of a film, after the final shot of a YouTube video, or when transitioning between scenes that need a softer break.
A fade-out can be used in several situations. It might mark the end of one scene before a new scene begins, help separate two scenes that don’t connect visually, or smoothly lead into credits, logos, or text. When working with two clips, a fade-out is sometimes paired with a fade in on the next clip, creating a smooth visual handoff rather than a hard cut. This technique is especially common when the editor wants the viewer to focus on mood rather than action.
There are different ways to create fades in video editing software. The most common approach is using a fade transition, such as a dissolve transition or film dissolve transition, which blends the clip into black or into another clip over a set duration. Another method involves manually adjusting settings like opacity inside the effect controls panel, giving more control over how fast or slow the fade happens. Both approaches are valid, and the choice depends on the level of precision you want.
Fade-outs are also closely tied to storytelling. In a single scene, a fade can indicate the passage of time or emotional resolution. Across multiple scenes, fades help organize the structure of a video, making it easier for viewers to follow changes in location or tone. Even simple videos benefit from fades, as they make the editing feel intentional rather than rushed.
It’s important to distinguish a fade-out from other transitions. A fade is gradual and smooth, while a cut is instant. A dissolve blends two images together, while a fade usually transitions to a solid color, most often black. Each transition has its place, but fades are especially effective at endings, pauses, and scene closures.
In Adobe Premiere, fade-outs are considered a default technique for finishing clips cleanly. They’re easy to create, flexible in length, and adaptable to many styles of video. Understanding what a fade-out effect does and when to use it is the foundation for applying fades effectively later in the editing process.
Different Ways to Fade Out Videos in Premiere Pro

There are several reliable ways to create a fade out in Premiere Pro, depending on how much control you need and what type of scene you’re working with. Some methods are faster and ideal for beginners, while others give you precise control over timing, length, and style. Below are the most common and effective techniques used in Adobe Premiere Pro.
Fade Out Using the Default Transition (Cross Dissolve)
The fastest way to add a fade out effect is by using the default video transition. In most Premiere Pro setups, the default transition is Cross Dissolve, which is part of the film dissolve family. This method works well when you want a quick fade without adjusting individual settings.
To use it, place your video clip on the timeline, move the playhead to the end of the clip, then right click and choose to add the default transition. Premiere Pro will automatically apply the dissolve transition, creating a smooth fade as the clip ends.

You can also apply it by dragging the transition from the video transitions folder inside the effects panel and dropping it onto the end of the clip.
This approach is ideal for simple edits, short videos, and situations where speed matters more than fine-tuning.
Fade Out Using the Film Dissolve Effect Transition
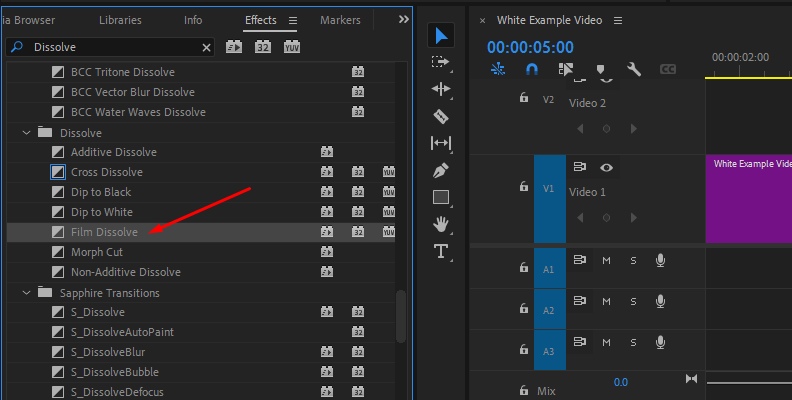
Another common option is using the Film Dissolve transition directly. This is a classic fade transition often used in film and cinematic-style edits. You’ll find it under video transitions in the effects panel, alongside other dissolve transitions.
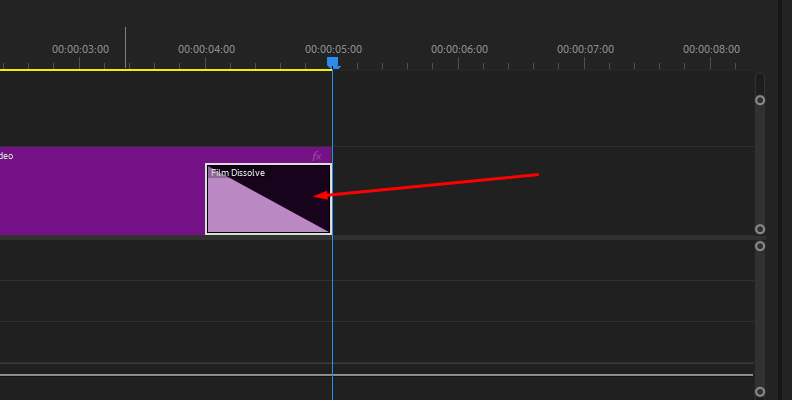
To apply it, double click the Film Dissolve transition or drag and drop it onto the end of a clip on the timeline. Once applied, you can adjust the duration of the fade by dragging the edges of the transition. This method works well when fading to a black background or when transitioning into a new scene with a softer visual finish.
Film Dissolve is a good choice when you want a slightly more cinematic look than a basic fade.
Fade Out by Adjusting Opacity for More Control
If you want more control over how the fade behaves, adjusting opacity manually is the best option. This method doesn’t rely on a preset transition and gives you full control over the fade effect.
Select the clip, open the effect controls panel, and locate the opacity setting under video effects. By adding keyframes at the beginning and end of the fade, you can gradually reduce the opacity from 100% to 0%. This creates a clean video fade that you can fine-tune precisely.
This technique is especially useful when you want to control the exact timing, length, or curve of the fade out effect, or when working with complex scenes.
Fade Out to Black Using a Solid Color
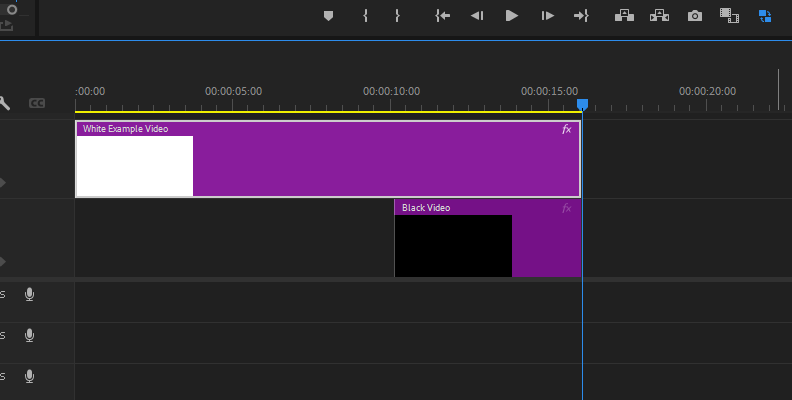
Fading out to black is one of the most common uses of fades, especially at the end of a video or scene. To do this, you can create a solid color clip and place it below or after your video clip on the timeline.

Once the solid color is in place, apply a fade transition or adjust opacity so the video gradually disappears into the black background. This method is helpful when working with multiple clips or when you want consistent fade timing across different scenes.

It’s also a reliable way to prepare a video for credits, logos, or text.
Fade Out Text and Graphics
Fade-outs aren’t limited to video clips. You can also fade text, images, and other overlays. To fade text, select the text clip, then adjust the opacity in the effect controls panel or apply a dissolve transition just like you would with video.
Text fade effects are commonly used for titles, lower thirds, and end screens. They help text feel integrated into the scene rather than appearing or disappearing abruptly.
Fade Out with Audio for a Smoother Finish
A visual fade often feels incomplete without matching audio. In Premiere Pro, you can fade audio by applying audio fades or adjusting volume keyframes. When video and audio fade together, the transition feels more natural and professional.
This is especially important at the end of videos, during scene changes, or when moving into a new scene.
Each of these methods serves a different purpose. Knowing when to use a transition, when to adjust settings manually, and when to combine fades across video, text, and audio will help you create cleaner, more intentional edits in Adobe Premiere Pro.
Fade In and Out with Keyframes
Using keyframes gives you precise control over fades and is ideal when presets don’t offer enough flexibility.
Step 1: Select the Clip On the Timeline
Start by selecting the clip you want to adjust on the timeline. This method works for video in Premiere Pro as well as images and graphics. Make sure the clip is placed correctly at the beginning or end of a scene before adding fades.
Step 2: Open the Effect Controls Panel
With the clip selected, open the effect controls panel. Under video effects, locate opacity. This is where you’ll create and adjust the fade manually for full control over the transition.
Step 3: Create Keyframes for Fade In and Fade Out
Click the stopwatch next to opacity to create your first keyframe. For a fade in, set the opacity to zero at the beginning, then increase it to 100 percent. For a fade out, do the opposite near the end of the clip. This allows you to add a fade without using transitions.
Step 4: Adjust Timing and Length
Drag the keyframes to adjust the duration and smoothness of the fades. This method gives more control than a default fade and works well for single clips or multiple scenes.
Fade Out Video with Boris FX Continuum
Continuum by Boris FX offers professional yet easy-to-apply solutions for all your editing tasks. It's the ultimate creator's pack that you can use not only in Premiere Pro but also in all other popular video editing programs, such as After Effects, Final Cut Pro, Avid, VEGAS Pro, DaVinci Resolve, and more.
With the free trial available, feel free to download Continuum and follow the step-by-step guide below to add fade outs to your videos in Premiere with ease and a lot of room for customization.
Step 1: Create or Open a Project in Premiere
If you already have an existing project, open it, but if you don't, you'll need to create a new one. You can do this in Premiere's home screen once you launch the software.

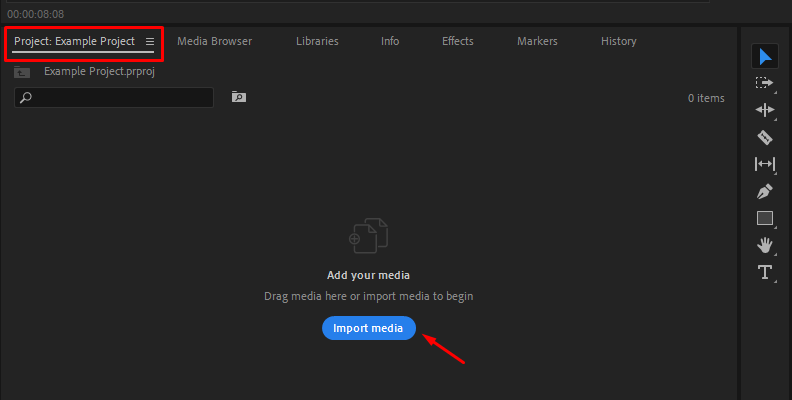
Step 2: Import a Video in Premiere
If your project already has a video imported, you can skip this step. Otherwise, you need to import a video as shown in the image below. Simply navigate to the "Project" tab and click the blue "Import media" button. Then, find the video on your computer's storage device and import it into Premiere.
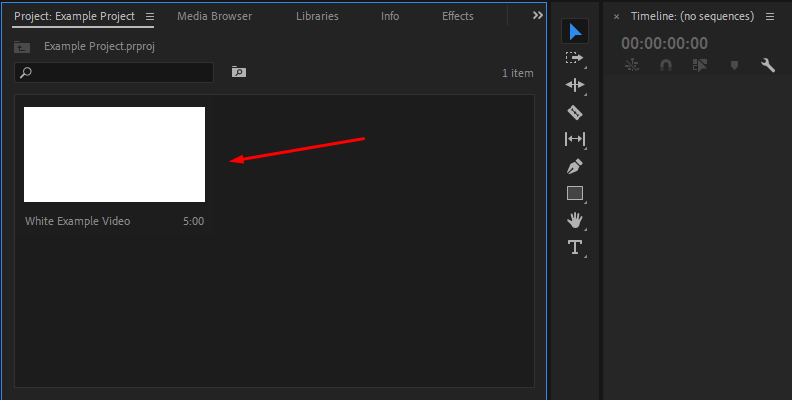
Step 3: Drag the Video to the Timeline Area (to Create a Sequence)
Once your video is imported, you'll need to drag it from the "Project" tab onto the timeline area. Simply drag and drop the video with your mouse cursor onto the timeline.
Step 4: Apply BCC+ Dissolve
Now that your video is added to the timeline area and you have a sequence ready to work on, click on the "Effects" tab and use the search bar to find an appropriate effect.
If you have Continuum installed on your PC and for your software of choice (in this case, Premiere), you will be able to find hundreds of different effects that can enhance your video in all sorts of ways. You can add text, create fancy transitions, restore images, add 3D elements, and much more.
In our case, we need a simple fade out, so we'll just use the BCC+ Dissolve effect. Continuum includes more than 45 different transitions, so you have a bunch of options if you'd like to stylize your transition.

Drag and drop BCC+ Dissolve to your video.
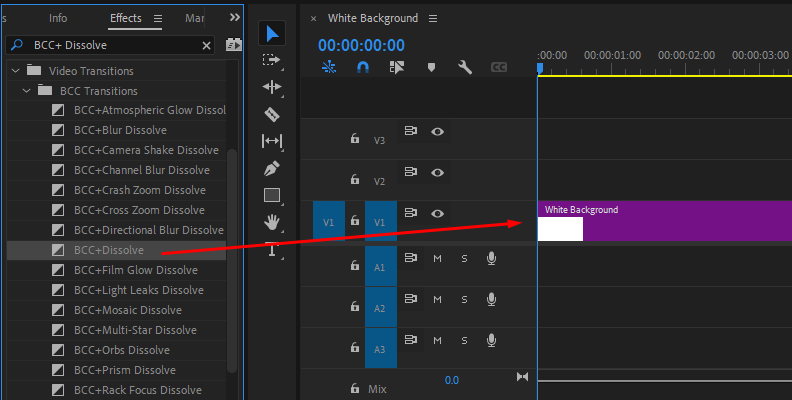
You can choose to add it at the start or at the end. Since we're doing a fade out, we'll be adding it at the end.

Then, you can open the "Effect Controls" panel, where you will find many different settings to adjust, though the fade out will work perfectly as it is by simply dragging and dropping it at the end of your video.
But, if you want to transition to the next scene in a more stylish fashion or simply make the fade-out look different than what the default setting offers, you can adjust colors, brightness, temperature, gamma, saturation, and more.

It's that simple yet customizable with Continuum!
Final Words
That concludes our guide on how to fade out a video in Premiere Pro, including some of the approaches with the built-in tools, as well as how to do it using a third-party plugin.
We hope this will help you with all your future work, and if it does, we'll be more than happy to hear it!