Sometimes, while editing a picture from a photo shoot or product photos, you suddenly notice some pixelated areas in the photo: blocky and distorted pixels can make the image appear poor when you zoom in.
Pixelated pictures are a common issue in digital photography, but knowing the cause of pixelation can help you prevent it in future pictures. When the problem is there, the only way to fix it is in post-production!
In today’s tutorial, we’ll explore the causes behind pixelation and how to avoid and fix pixelated pictures in one click using Optics by Boris FX.
Let’s dive in!
What is Pixelation
Pixelation is an effect that occurs when a picture looks blocky and blurry, like an 8-bit video game. It may not be obvious in some photos, but if you zoom in, you’ll see these sharp blocks and blur.
The pixelation effect is more pronounced when looking at old photos on a high-resolution display. It can also be more perceptible when you print an image that has been heavily compressed or downloaded in low quality.
Pixelation can happen for various reasons, but it can also serve as a creative effect to give a photo a vintage look through tools and filters in any photo editing software. Let’s explore what causes pixelation and what we can do to prevent it.
Why Does Pixelation Happen?
A digital image consists of plenty of pixels, which are small blocks of color information. The more pixels an image contains, the more information it has to accurately represent real-life colors, resulting in higher image quality. On the other hand, if an image has less information, it contains fewer pixels and, therefore, has lower quality, leading to a blurry photo with blocky edges, known as pixelation.
A pixelated photo can result from several factors. Here are some of the most common causes and ways to prevent them.
-
Low-quality Images: Low-resolution images have fewer pixels. If you want to print or scale up a low-quality image, it will result in a pixelated image. There's not much you can do to fix an image that does not have enough pixels. Some tools, such as Continuum UpRes ML, use AI to upscale an image and retain quality; however, it is best to use higher-resolution images when possible.
-
Improper resizing: Resizing an image by stretching it can result in a pixelated image. This is especially common with low-quality photos. Always use scaling or resizing tools and the right resolution settings when upscaling low-res images to avoid blurring the details and the blocky look on the edges.
-
Image Compression: Editing and compressing an image using photo editing software may cause it to lose quality and become more pixelated. Be cautious about how much editing you apply to a picture, especially if it's in JPEG format or an enlarged photo. Working with a lossless format when editing photos is the best way to preserve more quality and prevent pixelation.
-
Compressed:
-
Original:

-
Social Media Upload: Pixelation is common when you upload your photos on social media, as they get compressed to make the file size smaller. They will look good on social media, but if you download them again and want to print them or use them on a webpage, you’ll notice the quality loss and blurriness of the pixelation effect. To prevent this, keep a copy of the photo you upload in high quality so you can upload it or use it somewhere else.
How to Fix Pixelated Image with Boris FX Optics' DeBlock
Various tools are available to remove pixelation, including tools to unpixelate images online. Most methods include multiple effects and filters, such as blurring to soften the sharp pixels and sharpening tools to restore some of the lost detail caused by blur effects. Tweaking and adjusting these effects to remove pixelation can take some time and may not work in all scenarios.
A quicker way to achieve this is by using the DeBlock filter in Boris FX Optics. DeBlock fixes the blocky squares caused by high compression. It's an easy-to-use filter that requires no adjustments, as it automatically identifies the individual pixels with artifacts and removes them.
-
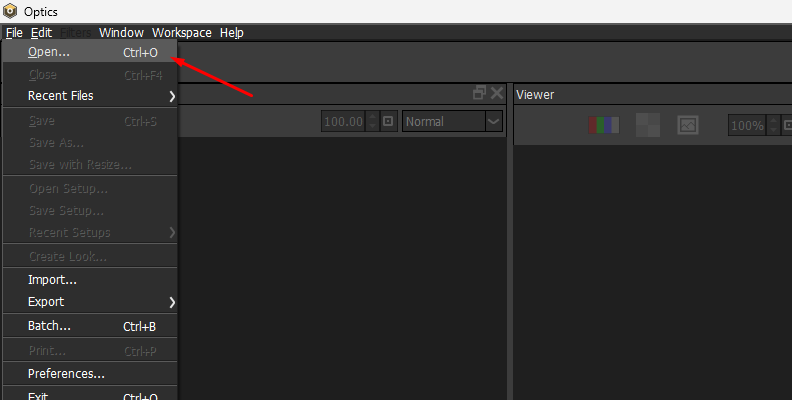
Step 1: Install Optics

Download the Boris FX Hub. You can find it on any Optics page by clicking Download Free Trial, in the email you received when purchasing a license, or on the Download page by selecting the Boris FX Hub for your operating system. Once downloaded, run the installer.
Run the Boris FX Hub and sign in with your credentials. Find Optics and click Install. The installation includes the standalone app and the plug-in for Photoshop and Lightroom.
-
Step 2: Launch Optics
Run the Optics app and import the pixelated photo you want to fix. If you are using the Optics plug-in, import the pixelated image to Photoshop or Lightroom and then add Optics as a filter, following the instructions for each program.
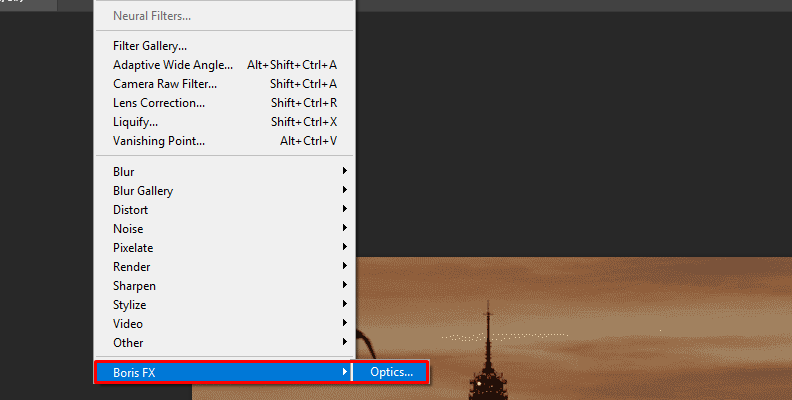
Photoshop: Open your image. Right-click the layer and select "Convert to Smart Object" to allow the Optics filter to be edited. Go to Filters and find Boris FX, then choose Optics.

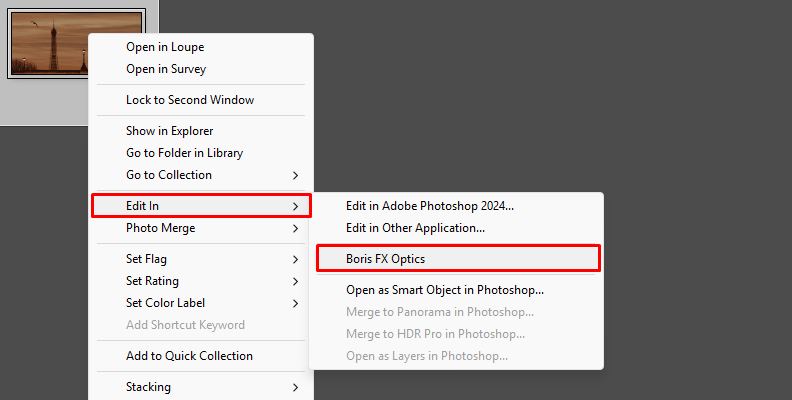
Lightroom: Open the pixelated image. Go to Photo and select Edit in > Optics. Or right-click the picture and choose Edit in > Optics from the drop-down menu.
-
Step 3: Navigate Optics UI
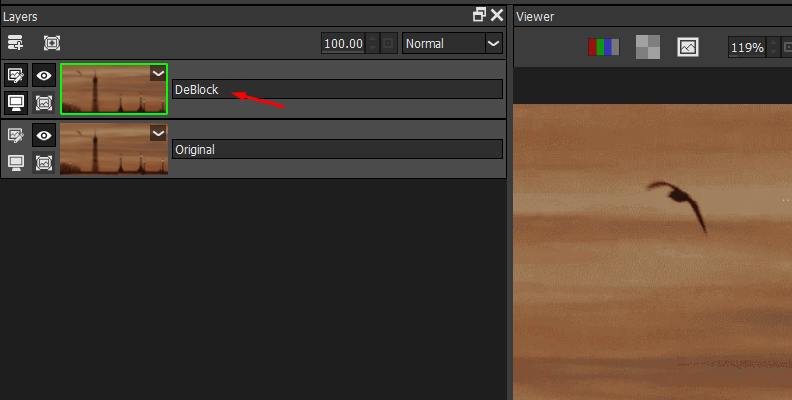
The Optics user interface is easy to navigate. The workspace can be customized to your liking by moving the panels. However, the first time you open Optics, it will have the layers panel and presets on the left side, the viewer and filter library at the center, and the parameters on the right.
When you open Optics from Photoshop or Lightroom, the pixelated image will be imported into Optics with the original layer and a layer to apply filters.
-
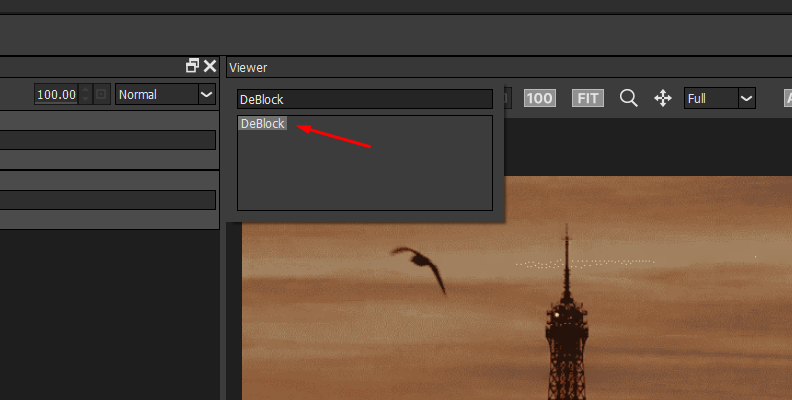
Step 4: Add the DeBlock Filter
Select the Image category from the filter’s library on the bottom center and find the DeBlock filter. Click the DeBlock filter to apply it to the current layer. DeBlocker has no presets or parameters.
-
Step 5: Further Adjustments
You can continue working with the pixelated photo to achieve enhanced image quality by adjusting the layer opacity or changing the blend modes to combine the layer with the layers below. This allows you to add more layers and filters to create different looks.
You can also try using Masks to limit filters to the more pixelated area of the image. You can add more instances of the DeBlock filter or other Optics image restoration tools.
-
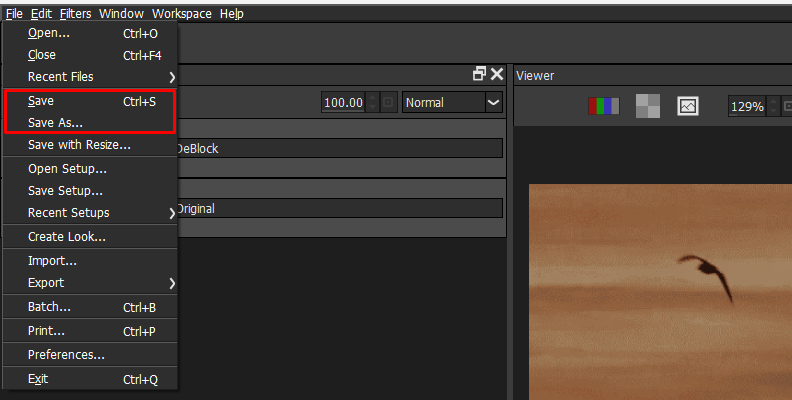
Step 6: Render the Unpixelated Image
In the plug-in version, click the Apply button to save the changes and render in Photoshop. In the standalone version, click File > Save to export the image in your desired format.
Final Words
Optics filter DeBlock is the easiest way to unpixelate images, but remember that some photos can be too pixelated, and it may not work for every pixelated case. Scaling up small photos with missing pixels and other blurry images may require different tools and effects to fix the issue fully. Always aim to balance image quality and pixelation when a pixelated photo cannot be saved.
Get Optics today and explore the filters to correct, enhance, and unpixelatemultiple images!
Good luck!