


Anyone interested in animation and VFX constantly hears the word rotoscoping. This technique allows you to create realistic visual effects and animations, remove unwanted objects, backgrounds, and assets, and replace them with CGI, graphics, and otherworldly scenarios.
In this tutorial, you’ll learn how to rotoscope in DaVinci Resolve using masking tools and Silhouette, a powerful and industry-leading rotoscoping plug-in.
Let’s dive in!
What is Rotoscoping?
Rotoscoping is a compositing, animation, and visual effects technique that involves manually tracing over live-action footage frame by frame. It is used for compositing multiple images and creating realistic animations with complex movement. However, you can also separate objects to place graphics, text, or other elements behind them, replace backgrounds, and remove objects from the scene.
Rotoscoping tasks can be very time-consuming, even in today's digital post-production era. You still need to manually draw masks around the subject you want to isolate, and sometimes, you need to break it down into multiple masks for complex shapes such as bodies.
How to Rotoscope in DaVinci Resolve
DaVinci Resolve is professional video editing and compositing software with many rotoscoping tools. In this tutorial, I’ll show a way to rotoscope from the DaVinci Resolve Color page, which is easier for beginners.
Step 1: Set Up Your Project
Create a new project or open an existing one, and import your video file for rotoscoping. Then, click the color page icon at the bottom of the screen to go to the color workspace.
Right-click the clip in the node grid area and select Add Node > Add Serial to add a node next to the current clip, where you’ll perform all the rotoscoping tasks.
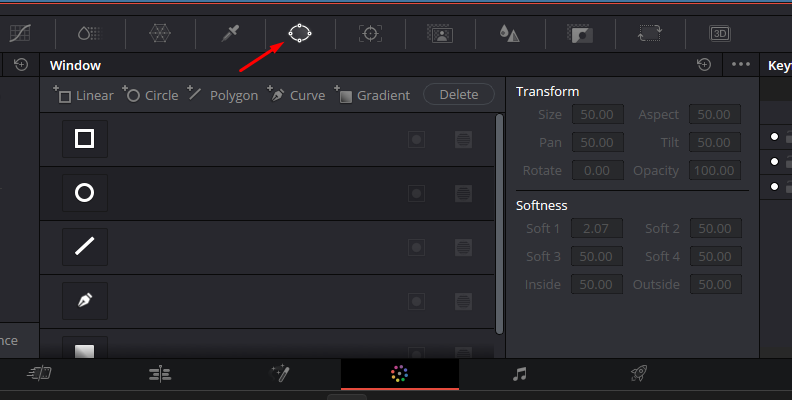
Step 2: Create a Mask Shape
Select the new node clip and click the power window tab in the toolbar to see the masking tools. You can select different mask shapes depending on what you want to mask. For round objects, you can click the circle and adjust it to the object on the screen. You can use the pen tool to hand-draw the mask for complex shapes.
Step 3: Track Window
Click the Tracker tab from the toolbar to change to the tracker window.
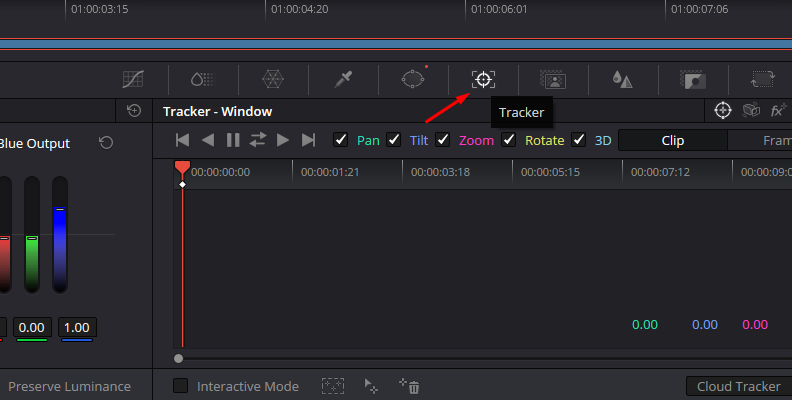
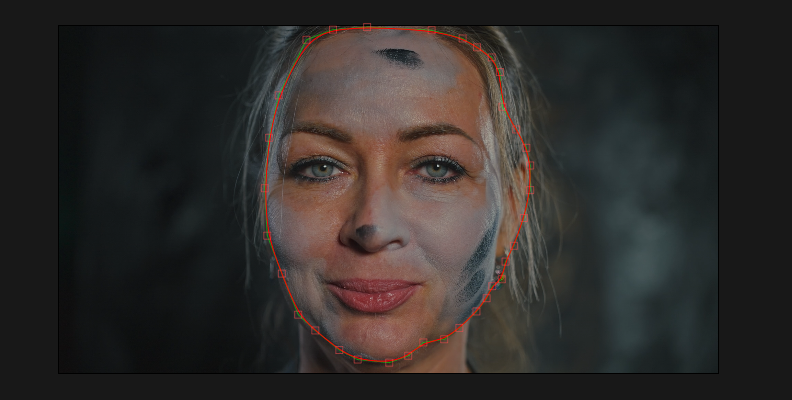
Choose a reference frame where the object is fully visible and draw the shape with the selected mask tool.
You can enable the Interactive Mode checkbox at the bottom of the Tracker Window. With Interactive Mode enabled, you can add or edit tracking points.
Once you have the first shape, you can begin tracking it. Select the parameters to track, then select track forward or backward, depending on your position in the timeline.
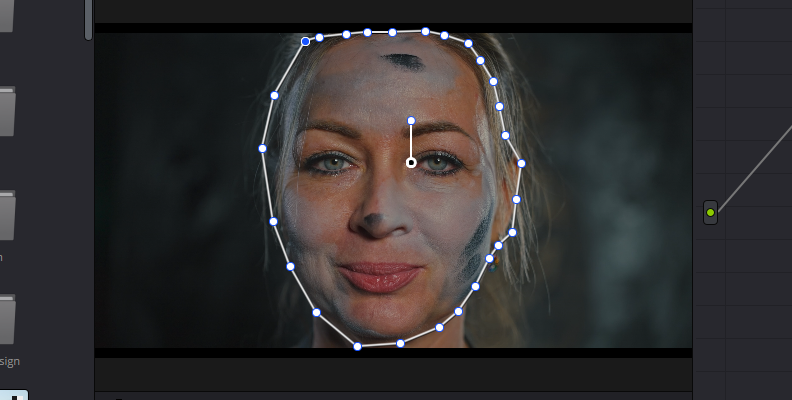
Tracking isn't always perfect, and at times, you may need to fine-tune the mask. Look for a frame where the mask doesn't follow the subject accurately, and add drag or include more points. Use shift-click on the viewer to create a bounding box and select multiple points.
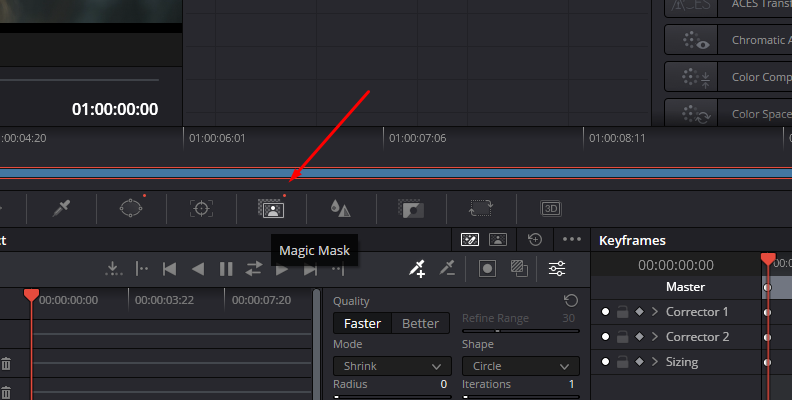
Step 4: Alternate Masking With Studio and Magic Mask
If you have DaVinci Resolve Studio, using Magic Mask is a faster way to create a mask. Click the Magic Mask tool and select whether you want to mask an object or person. Draw inside the object you want to mask, then use the tracking options to track the magic mask forward and backward. DaVinci Resolve will automatically generate tracking points and create and track the mask.
Step 5: Create an Alpha Output Node
Right-click in the node grid and click Add Alpha Output. A blue circle will appear at the end of the node sequence. Connect the clip’s mask output (the blue square) to the Alpha output to isolate the masked object.
Step 6: Replace Background
Return to the edit page and drag your new background under the original clip. The isolated object will appear on the new background.
How to Rotoscope in DaVinci Resolve with Silhouette
Silhouette is professional rotoscope and paint software, and plug-in for compositing and visual effects. It is a node-based system with over 400 nodes, which are the basic building blocks for masking, painting, keying, tracking, color correction, and other image processing filters.
The standalone application features the Sapphire, Continuum, and Particle Illusion nodes to enhance your compositions with visual effects, particles, and filters. You can get the standalone application and the multi-host plug-ins or just the plug-in that supports DaVinci Resolve.
To continue with this tutorial, you can download the Silhouette free trial.
Step 1: Set Up Your Project
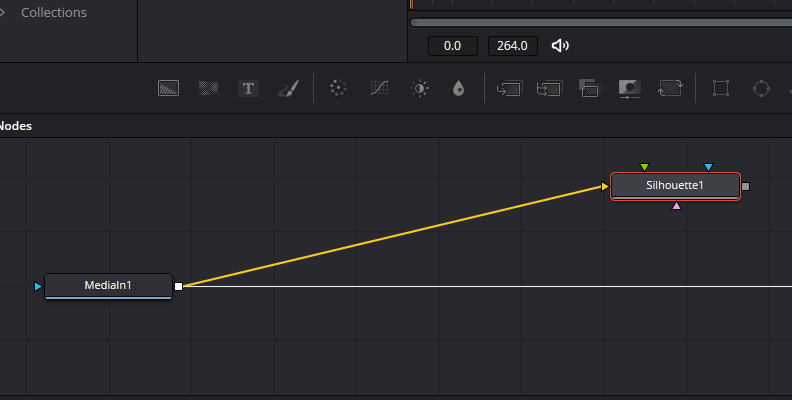
Import your video and create a new timeline. Go to the DaVinci Resolve Fusion page and press CTRL or Command + Space to open the toolbox dialog. Search for Silhouette.
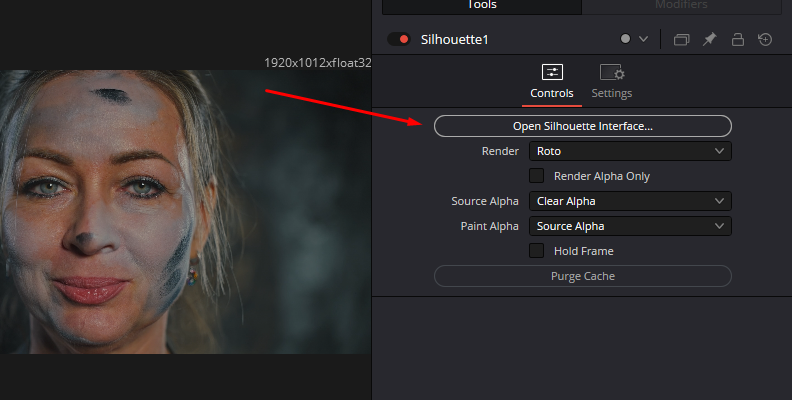
Connect the MediaIn node output to the Silhouette input. Display the Silhouette settings in the Inspector, and click "Open Silhouette Interface." When the Silhouette UI launches, create a new Roto project.
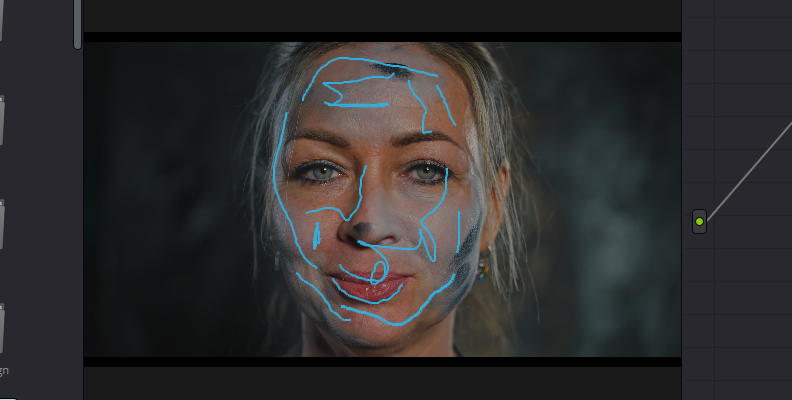
Step 2: Traditional Rotoscope in Silhouette
Silhouette will import the video from DaVinci Resolve and add the Roto node in the Trees panel. Use the tools on the left side to draw a mask shape around your subject. The mask will appear under the object list for each shape you create.
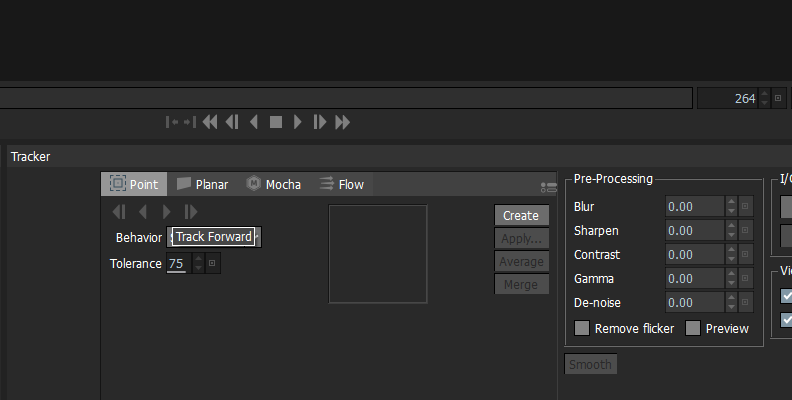
Then, select the Tracker tool from the panel tool or press Shift + T. Silhouette offers different tracking methods such as point tracking, planar tracker, and Mocha. Choose your preferred tracking method and press the track forward and backward controls.
Step 3: Speed Rotoscoping in Silhouette
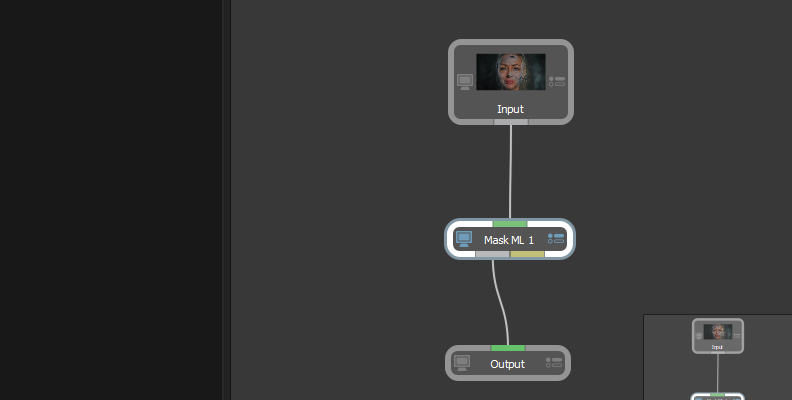
Silhouette offers new AI tools to accelerate masking and tracking for rotoscoping work. If you are starting with a new roto project, select the Roto node and press the Delete key. Press Tab and type Mask ML in the search box. Then, press enter to add the Mask ML node. Connect it between the input and output nodes.
Generate Matte
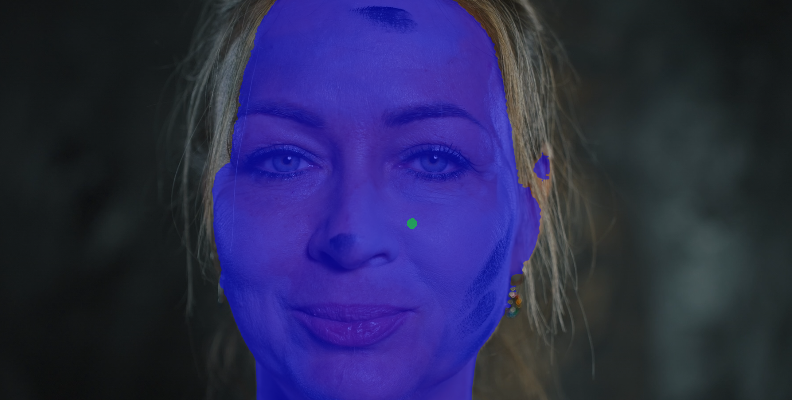
Click the subject to let Mask ML automatically analyze the footage to generate the mask. Right-click to select parts of the object and left-click to remove them from the mask.
Animate Matte
Press Tab to search for Matte Assist ML and hit enter to add the node. Connect it between the Mask and Output nodes, and remember also to connect the yellow data connectors to send the generated matte information.
In the Matte Assist ML parameters, select Input Alpha as the Mask Source and play the sequence as the mask animates. You can use additional tools to refine the matte, such as the Power Matte node for complex transparent objects like hair.
Render Final Video
Save and exit Silhouette to return to DaVinci Resolve. In the Silhouette settings on the Inspector, select Render Output: Cutout. Return to the Edit page and continue editing to finish your video project and render the final video output.
Final Words
Silhouette's machine learning tools can help speed up the usually challenging rotoscoping process. You can use these quick tools to create garbage mattes and then employ Silhouette's traditional rotoscoping tools to achieve detailed and precise results.
With DaVinci Resolve and Silhouette, you have everything necessary to enhance your compositing skills and add complex, stunning visual effects to your upcoming projects. Start your free trial today to get a glimpse of all that you can achieve with Silhouette.
Good luck!


