Are you tired of the tedious process of masking a subject? Are you new to image masking techniques or want to find a quicker option to create a mask?
In this image masking guide, you'll learn about image masking, its purpose, the types of image masking, and how to work with image masking using the EZ Mask tool in Optics to generate quick and precise masks for your images.
Let’s dive in!
What Is Image Masking?
Image masking is a technique to isolate or separate specific parts of an image from its background, which allows more accurate editing and manipulation of the selected areas.
Think of image masking as making a cutout on a photo to place it on a different one, blending them to create a collage, or putting the cutout over the subject and painting the rest of the background image without affecting the subject. The cutout is the mask. Except that in post-production, image masking is non-destructive. Any photo editing software can undo all the image and mask changes.
To create the mask, you can use various tools within your photo editing software, like paint brushes to directly paint over the image of the parts you want to reveal or conceal, and selection tools to encompass the element to isolate with the mask.
Today, image masking techniques are available in most image editing tools and plug-ins, such as Photoshop and Lightroom.
What Is the Purpose of Image Masking?
Now that you have a better understanding of image masking, let's review the purposes of using masks in your image editing work.
Background removal. Background replacement is an essential skill in image editing and graphic design. It allows you to remove the background of a photo and save the image with transparency. You can use that image for other projects, such as marketing flyers, artistic work, and posters. You can also use it to create funny photos, like your pet in space.
Retouching and digital makeup. Masks are an easy way to retouch a photo. Select the part of the face you want to modify, like the lips to enhance their color, the eyes to change their color, or to add and remove scars and tattoos.
Selective color correction. Masks allow you to make selective adjustments, such as color correction, whenever you need to change the color and add more contrast or brightness to a specific element without affecting the entire image.
Compositing multiple images. Masks are great for taking individual elements from multiple images and compositing them into a single design. You can create incredible artistic and cinematic photos.
Hide parts of the image. You can hide sensitive information by masking that part of the photo and applying an effect such as a blur to conceal the info or faces to protect privacy.
Visual effects. Another common use is to create a mask to add visual effects to the image. You can add rain and thunder lighting in the background, a ball of fire over your hand, or particles sparkling from a magic wand.
Draw attention to the subject. Isolating the subject from the background can help you draw attention to the subject. Enhancing the subject with filters or blurring the background to add more depth.
Image masking enhances image quality by providing greater control over each section and allowing for selective adjustments when necessary.
Types of Image Masking
Image masking can be achieved using different types of masks, depending on the goal and the software you are using. The following list presents the most common types of image masking.
Layer Masking
Layer masks are the most common type of image masking. They allow you to select which parts of a layer to hide and which to reveal. Usually, you can use a paintbrush or a shape tool to choose the parts of the layer to hide. The most common use of this technique is for isolating the subject and background.
Vector Masks
You can use vector shapes for image masking. The advantage of using vector shapes is that the vector masks can be scaled and edited without losing image quality. They can create well-defined masks with sharp and clean edges. Vector masks are best suited to work with elements that have clean edges, such as logos or text.
Clipping Masks
A clipping mask is a layer-based image masking type in which the visibility of one layer is restricted by another. They are the best choice for adding texture to a shape, creating photo frames, or filling a text with images. However, they are not the best choice when you need clear, defined edges.
Gradient Masks
Gradient masks use a gradient to determine an image's visible and hidden areas. The main difference is that they create smoother transitions between the two regions. A gradient mask's smooth and gradual nature creates a better blend in the final image. The two gradient types can be linear gradient for a straight transition or radial gradient for a circular transition. Gradient masks are best when you need seamless blending, for example, for skies or creating a vignette effect.
Alpha Channel Masking
Alpha channel masking is the most advanced type of image masking. An alpha mask is stored in the image's alpha channel with the transparency information. The masks can be seen in the alpha channel as black, white, and grey sections, where white is the visible area, black is the hidden area, and grey is partially visible. Alpha channel masking works better when you need to create detailed masks, such as hair, fur, and feathers.
Create Image Masking with Optics EZ Mask in 3 Easy Steps
Optics is a photo editing software and visual effects plug-in for Photoshop and Lightroom. It features advanced machine-learning masking and painting tools to replace backgrounds, isolate subjects, backgrounds, and effects, or fix and retouch pixels in the image.
EZ Mask is an easy-to-use image masking tool in Optics. It estimates the transparency values based on samples of foreground, background, and unknown areas defined by the user. With a few clicks, optics can quickly isolate almost any type of object, including hair and reflections.
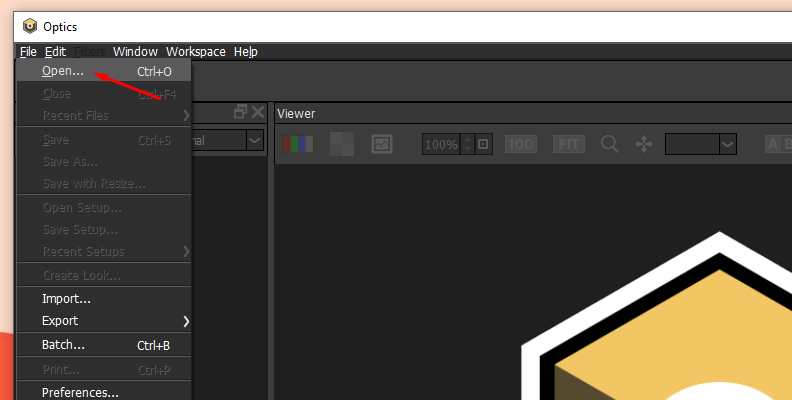
Step 1: Launch Optics
To launch Optics in the standalone applications, run the application and import your images from File > Open.
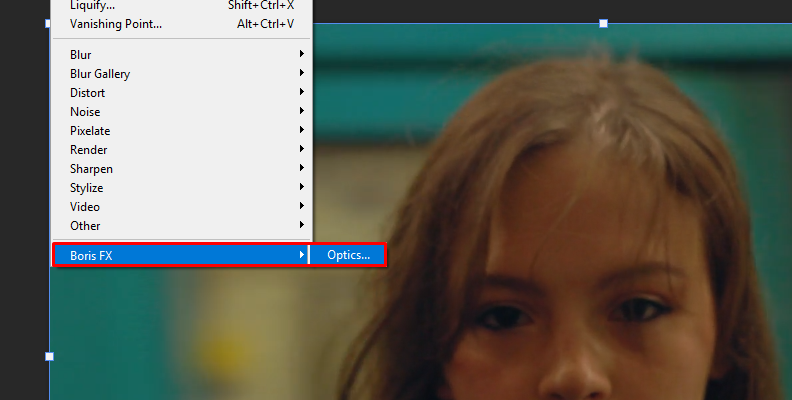
If you're using the plug-in version, you must apply Optics as a filter to open the Optics interface.
Photoshop: Click the filter menu and select Boris FX > Optics. Remember to convert your layer to a smart object so you can make changes.
Lightroom: Go to the Photo menu and select Edit in > Boris FX Optics.
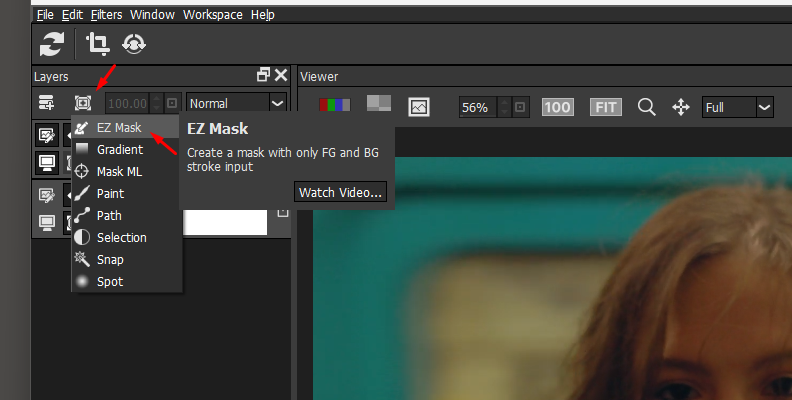
Step 2: Add an EZ Mask
Click the Add Mask icon in the layers panel and select EZ Mask from the dropdown menu.
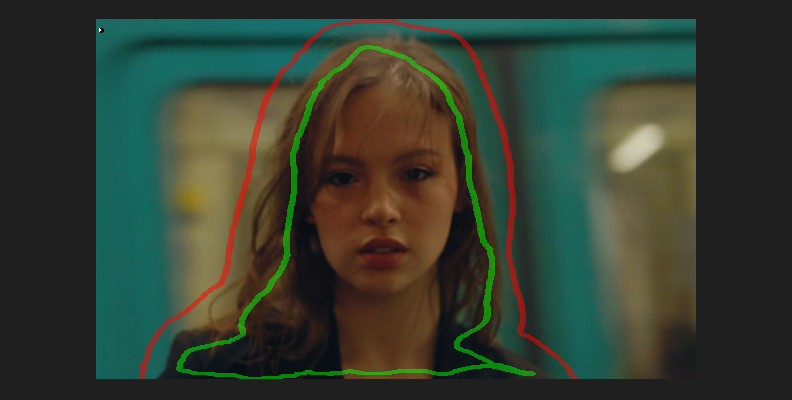
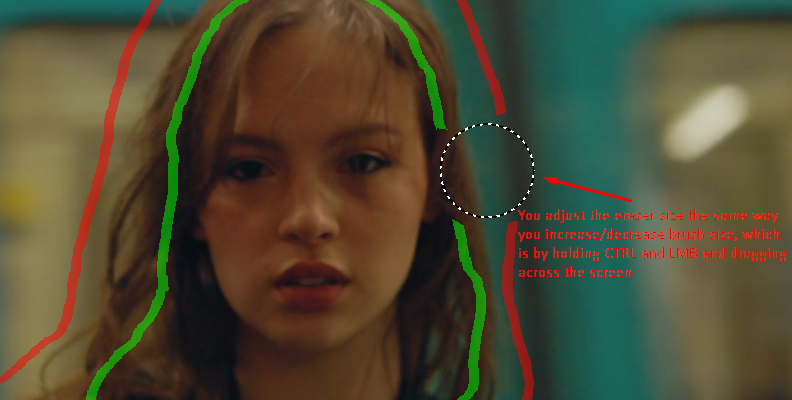
Use the Paint Foreground brush (green) to draw an inner outline around the subject you want to isolate. Then, select the Paint Background brush (red) to define the background by drawing lines outside the subject. Try to paint as close to the edge of the subject without going over it.
You can also use the Paint Unknown or Paint Missing brushes to select areas that are neither background nor foreground or are mixed, adding more detail to the edges. This is especially useful when masking hair or fur, which can be transparent and overlooked by the other brushes.
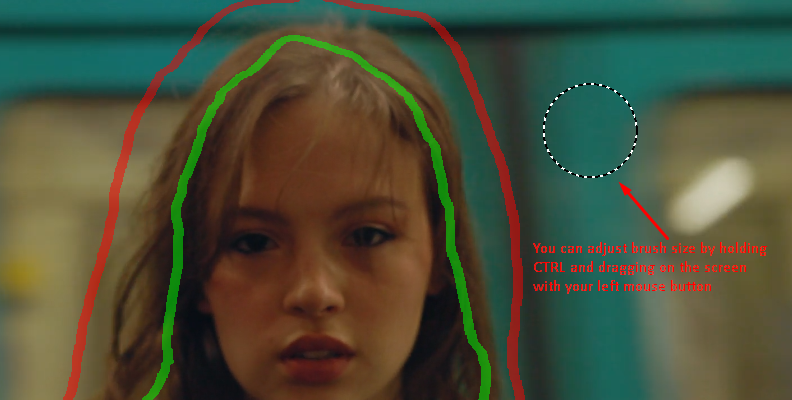
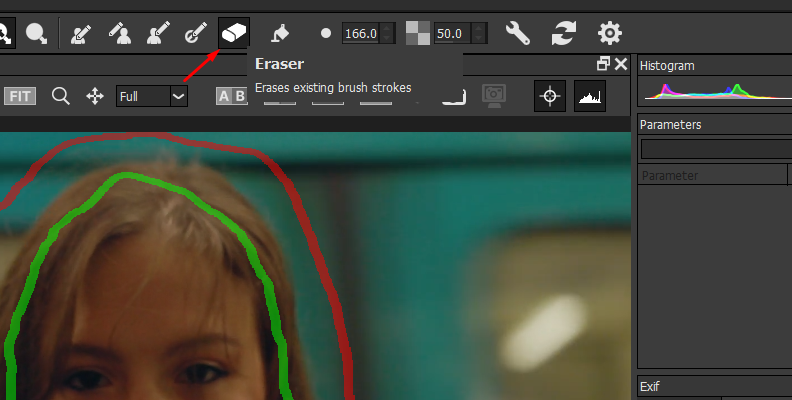
You can adjust the brush size to select smaller or bigger areas of the image to paint. Use the eraser to clean brushes, or click the Reset icon to clear all brush strokes and start over.
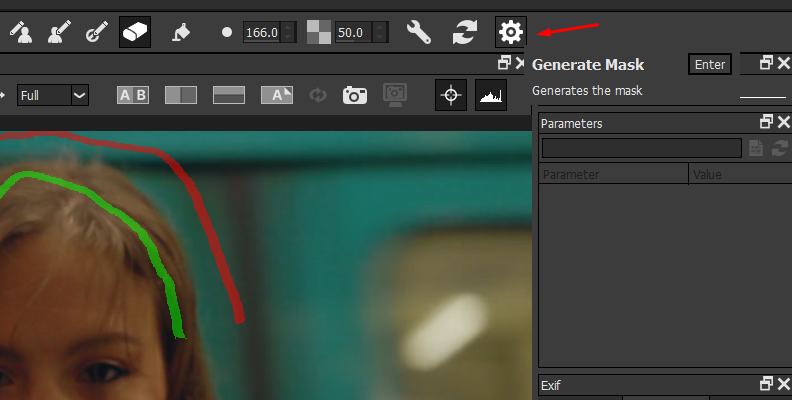
Step 3: Generate Mask
Once you're done painting your mask over the image, click the engine icon or press the Enter key to start the image masking processing to create the mask. And you're done!
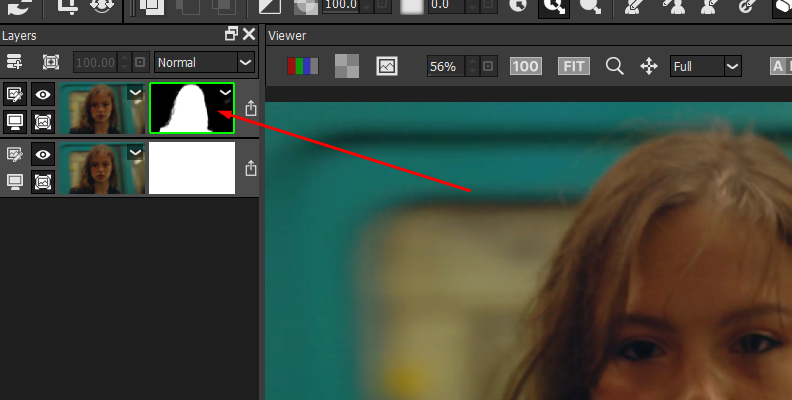
Now, you should be able to see the mask layer next to the image layer. All you have left is to apply the effects you want to isolate or the retouch you need to do to your photo. You can go to the layer and make changes or delete it and create a new one.
Final Words
The image masking techniques can open the door to many creative solutions, ideas, and artistic projects; it's a tool that every photographer and photo editor should learn and add to their photo editing skills. Whether you want to remove backgrounds for fun, make selective adjustments to your client's photos, or composite cinematic images to add to your portfolio and attract more clients.
If you already use masks and are looking for a way to generate masks with precision, quickly, and easily, the EZ Mask tool in Optics will improve your workflow with fast mask creation.
Get your Optics free trial and unlock your image masking skills.
Good luck!