There are a number of different tools any music producer can use to try and get the best sound from the recording they have made. Using compression is a common one during both the mixing and mastering process, and an important one for any budding producer to get to grips with.
However, compression does not exist as a single tool or approach, and one of the alternatives is parallel compression.
What is Parallel Compression?

To understand parallel compression, you need to know what "regular" or normal compression is. A normal compressor takes the audio signal you want to process and reduces the dynamic range of that audio signal. This is often referred to as downward compression - reducing the peaks of the signal - and is dynamic range compression, so there's no way the signal exceeds a particular limit.
It reduces the difference between the loudest parts and the quietest parts of the signal without any gain reduction (that is to say, without reducing the volume).
This produces a more consistent listening experience for the listener, and it means that changes in volume within the track are less jarring and extreme. This makes the track more consistent overall and produces a better final result.
Parallel compression (sometimes referred to as New York Compression) works in a similar way, by applying compression and reducing the dynamic range of the track. Although, parallel compression is known as upward compression because you are increasing the quieter parts of the track.
However, parallel compression allows you to blend the original signal with the processed signal. This means the final result is a mix of the original signal and the processed one. This gives the producer more control over the final result.
The original signal is usually referred to as the dry (or unprocessed) signal, and the processed signal is referred to as wet. These signals are processed independently, allowing the producer to apply other effects to them, such as EQ. Mixing the wet and dry signals after this produces the final result.
It's worth noting that many compressors these days come with wet and dry controls, which allow you to blend signals together. This is, strictly speaking, not parallel compression. These plug-ins will allow you to blend a wet and dry track together, but they won't allow you to add any other effects or use any other plug-ins on the output. You will also have more limited control over the end result. That's not to say you can't achieve good sounds with them, but it's also not quite the same thing.
What is the Main Purpose of Parallel Compression?

Parallel compression is used when you want to use compression but require more control than you would get from a regular compressed signal. There are a few different scenarios where you might want to consider using parallel compression techniques to improve the quality of your signal.
-
Controlling Dynamic Range
This is traditionally what you would use a compression for. However, when it comes to using a parallel compressor, the ability to have much finer detail and control over the signal means you can produce far better results than with traditional compression.
Parallel compression sounds better than traditional compression because you have all that control, as well as the ability to apply other effects prior to mixing the wet and dry signals together.
However, the aim is the same - to control the dynamic range of the recording to produce the best-sounding track that you can. The more control you have over the sound, the better you can affect the dynamic range to ensure you get the results you want. In this, parallel compression is invaluable.
-
Make Sounds More Cohesive
If you are working on several tracks, which is likely if you're mixing pretty much anything that uses more than one element that's been recorded, using parallel compression helps you bring all the sounds you want together.
For example, if you are recording a song with two lead vocal tracks, you want them to sound like they "belong" together in the same song. Applying parallel compression can help you achieve a unified sound. You can process both vocals through the same parallel compression, meaning they will sound similar but without being overtly "processed", as you might get with traditional compression. The key win here is again the amount of control a producer has to achieve a particular sound.
-
Transient Shaping

Certain sounds benefit from parallel compression because it allows you to control the sound without necessarily having to make changes to the dynamics. This can be especially useful when producing drums, for example, and you want less dynamic range. Being able to blend the original dynamics with the same parallel processing you have set up lets you have ultimate control in shaping the transients exactly the way you want them.
How Parallel Compression Works Step by Step
To understand how parallel compression works, it's a good idea to go through it step by step so you can really get to grips with the basics.
-
What Do You Want to Achieve?

First, decide what it is you want to achieve when using parallel compression. This might sound obvious, but if you know what effect you are trying to achieve, it will make it that much easier to get there. If you just start fiddling around with settings randomly, you might vanish down a compression rabbit hole and never emerge again.
Setting a fast attack, fast release, and a high ratio will help control the dynamic range of anything you use parallel compression on. Character and color can be added by using a slow attack and release, and a low ratio. Medium settings will help with cohesion and bring all the sounds together.
Of course, none of these options is exclusive to the other. However, by understanding what you want to achieve, you will make your life that much easier when it comes to actually adjusting your compressor.
-
AUX Channel
Next, go to your DAW (Digital Audio Workstation) and create a dedicated AUX (or auxiliary) channel. This is also sometimes known as a return channel.
This creates a duplicate channel (or parallel track), which you will apply your compression effects to while leaving the original track untouched. That way, you have created a compressed version of the original and have wet and dry tracks which can be blended together.
It's also important to ensure that you do this pre-fader, or you will need to adjust the compressor whenever you adjust the volume of the original, which is an unnecessary hassle no one needs!
-
Place the Compressor on the AUX Channel
You then want to put the compressor on the AUX channel, as this is where you will be working on the wet signal and making adjustments to how it sounds. Listen to this channel exclusively and decide how much compression you want to put on the track. You can even put the same parallel compressor on the track more than once to achieve a desired effect.
You can also decide if you want to apply any other effects to the audio track, such as EQ or using a limiter, to the track as well. If so, add those plug-ins to the AUX channel as well. Adjust until you are happy with the sound you want to achieve.
-
Blend the Wet and Dry Signals
You can now use the AUX channel fader to blend the original and the compressed signal together. Find a balance you are happy with, and you're done!
Tools and Plug-ins for Parallel Compression
As you might expect, there is a wide range of tools and plug-ins for parallel compression. This is a roundup of a few of the best.
-
FabFilter Pro-MB
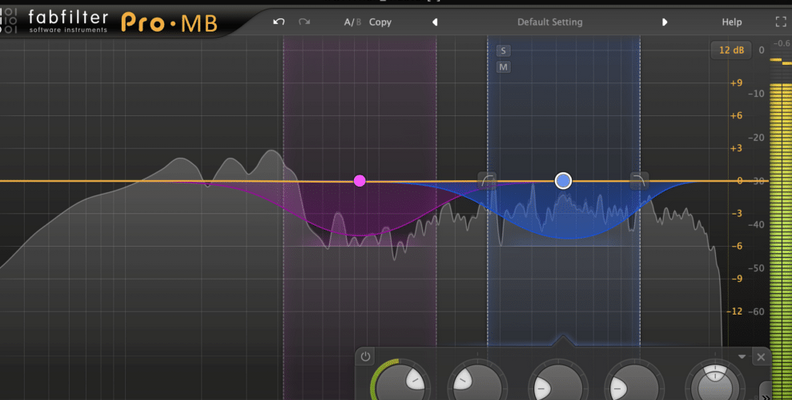
The FabFilter Pro-MB has a great reputation among producers and with good reason. The interface is clear, uncluttered, and intuitive, so even newcomers to the tool can get started with a minimum of fuss.
There are six separate bands that can be applied, a key difference from how traditional parallel compression works, but it produces great results. If you want to work in a more standard way, you can link these bands together to allow a conventional way of working.
The plug-in is also very efficient, so it puts a very low load on your CPU, meaning your DAW won't crawl to a stop every time you try to use it.
Overall, the FabFilter Pro-MB has earned its reputation and is a great compressor.
-
Vengeance Multiband Compressor
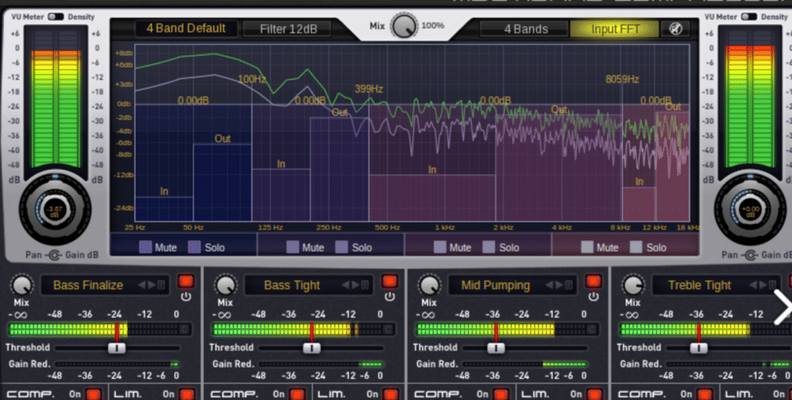
The Vengeance Multiband Compressor is quite a contrast to the FabFilter. Its interface is rather more old-fashioned looking, but don't let that fool you - there's still an incredible compressor here.
If you want to add punch to your mix, the Vengeance is a perfect tool for it. There are loads of presets to use, and it's especially useful for drum processing and percussion. Individual bands can be tweaked and adjusted nearly endlessly, and the plug-in also has limiters available, too, which you can easily combine with your compression. There are also anti-distortion filters, so you can stop your track from sounding like a heavily compressed signal, and the wet and dry tracks can be mixed together effortlessly.
The Vengeance might not be the most beautiful compressor on the market, but it's got it where it counts. Whether you need heavy compression or a gentle touch, you'll be able to achieve it all and more.
-
Softube Drawmer 1973
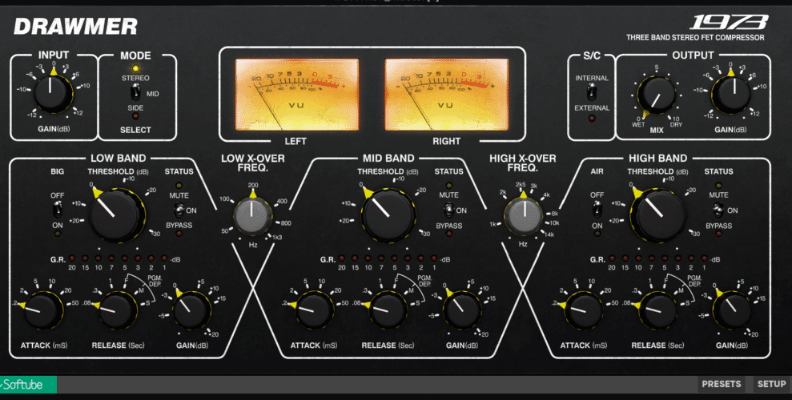
Making software versions of analog compressors can be a challenge, but fortunately, it's one that Softube is up to with the Drawmer 1973.
The compressor has been designed to replicate the warmth, quality, and flexibility of the original, which it does in spades. You can create different crossover points that can be changed, allowing for a fantastic dynamic response with that warm, analog feel that many people find so desirable while still being able to get aggressive compression if you want it. You can add a sidechain to allow the compressor to work with external sources.
Despite a look that seems a little intimidating on first appearance, the Drawmer 1973 is actually very simple to use, and you will appreciate its retro aesthetics even as you marvel at what a great piece of coding the software version is.
The Softube Drawmer is a great compressor if you really crave that vintage hardware feel in a modern context.
Final Words

Parallel compression is an incredibly useful way for any producer to process sounds. It takes the skills you have learned working with regular compression and allows you to develop subtlety, nuance, and control over your tracks. And the more control you have, the better the final sound will be!
FAQ
Parallel Compression vs Normal Compression
There's no doubt that normal compression is one of the most valuable tools in any producer's arsenal.
Normal compression, or downward compression, lets you control the dynamic range of your track to produce something that sounds better and that makes for an easier listening experience.
This is true whether you are producing music, a podcast, or anything else. The better the listening experience for the listener, the better engagement you will have with your content.
Parallel compression, or upward compression, allows you to use the same ability to control the dynamic range of your track but gives you much more control over the final result.
This can be fairly simple, as with blending the dry and wet tracks together, but it can also be more complex, so you can add additional production before blending the wet and dry signals together.
When Do I Need to Use Parallel Compression?
Whenever you want to apply compression to a track but require more control over your sound than a standalone compressor can give you, that's when you need to use parallel compression.
Because of the control parallel compression gives you, it's often the default way of applying compression to songs for many producers.
There are some specific scenarios when a parallel compressor is the ideal choice, such as when producing drums or when you want to add "punch" and a dense sound to your recording without altering the original dynamic range of the recording. A parallel compressor is invaluable for any producer to have in their kit.